It's been covered here before. I love pie. Pie Pie Pie.
Summer is a great time for pie (though in my opinion there is really no bad time for pie) because of all the fresh fruit that is in season. For my camping trip I decided to take advantage of the late running blackberry season and the early start of peach season and make a peach-blackberry pie.
One of the biggest stumbling blocks I run into when cooking is not paying enough attention. I either get am in such a hurry that I rush through and make mistakes or I get distracted and either overcooking something or letting something else get cold. I wanted everything to turn out delicious for my family so I managed to contain myself and take my time while still being quick and thorough.
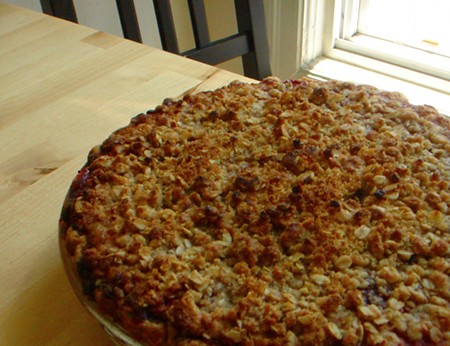
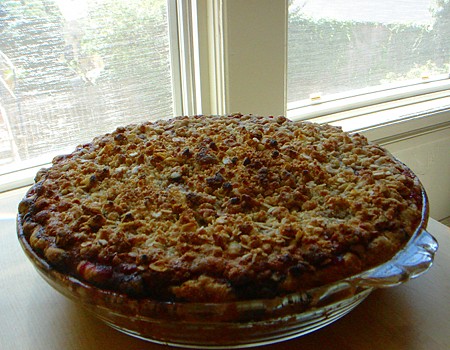
Peach-Blackberry Pie
This is a new method for making crust for me but it turned out REALLY well. It may be my new favorite crust recipe.
Crust
1 cup plus 1/4 cup flour
1/2 cup (one stick) butter, frozen
3-4 tbs water, ice cold
Pinch of salt
1) Take the stick of butter, frozen for at least 20 minutes, and grate into a medium-large bowl using the large holes of a cheese grater. Return to the freezer for 5-10 minutes. Use this time to chill ice-water if not already doing so.
2) In a small bowl, stir salt into flour to evenly distribute.
3) Add the flour to the butter and toss lightly with your fingers to coat the butter with the flour. Pour the water evenly over the butter and flour and stir lightly with your fingers.
4) Knead briefly with the butt of your hand until the flour, butter, and water just come together to form a dough. If the butter starts to melt stick it back in the freezer for 5-10 minutes to let rest/cool and take it out again to finish. The most important things are to keep the dough cool and not to over work it.
5) Once the dough is finished quickly shape into a ball and return to the freezer. You may wrap it in plastic and keep it for up to a month or use immediately after cooling for 20-30 minutes.
Filling
3 lbs of peaches, ripe
2 6oz packages of blackberries
2-3 tbs lemon juice, the juice of 1/2 a large lemon
1/2-3/4 cup brown sugar
1 1/2 tsp cinnamon
1 tsp ginger
1/4 tsp freshly grated nutmeg
5-6 tbs cornstarch
2 tbs butter, cut into 1/4 inch pieces
1) Prep the peaches by peeling, pitting, and slicing into 1/2 inch slices
2) Lightly toss together the ingredients except butter and cornstarch in a bowl. Taste and adjust sugar and spices as necessary. Start with the smaller amount of sugar, you will need to use more if your fruit is less than ripe, but should use as little as necessary.
3) Once filling is finished, add cornstarch to coat. Line an empty pie plate with plastic wrap, pour in pie filling, dot with butter, and freeze. Once filling is frozen solid, remove from pie-plate and wrap completely with plastic and then foil. Store in freezer for 1-2 months.
I pre-made my filling two weeks early when they had a special on peaches and blackberries at the market. If you are not going to freeze your filling, feel free to reduce the amount of cornstarch by a tablespoon or two and use immediately.
Crumble Topping
1/2 cup rolled oats
1/2 cup flour
1/2 cup brown sugar
1/2 cup butter, frozen and grated
A few grates of nutmeg
Pinch of salt
1) Freeze and grate butter as with crust.
2) Add all ingredients and mix thoroughly with fingertips until crumbly, pebble sized pieces form.
3) Stick in the fridge or freezer to keep cool until ready to use.
Assemble the Pie
1) Pre-heat oven to 375 degrees. Roll out the pie dough into a 12-13 inch circle and place in pie plate. Crimp edges and place in the freezer while you remove pie filling and let thaw 20-30 minutes on the counter.
2) Unwrap pie filling, it should still be solid but will be slightly softened edges, and place into the crust.
3) Sprinkle crumble topping evenly over the filled pie.
4) Bake at 375 degrees for approximately one hour. If edges start to get too dark wrap in foil. Make sure that the filling has heated all the way through.
Let cool completely and enjoy.
Sunday, August 22, 2010
Peach-Blackberry Pie
Wednesday, August 18, 2010
Cookies, Cakes, and Pie - Oh My!

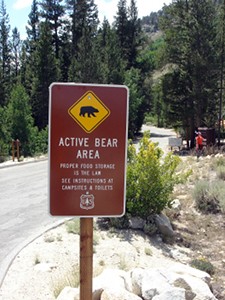
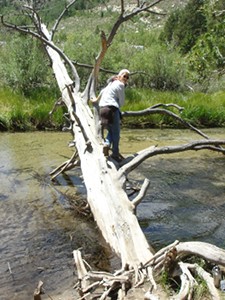
Earlier this month I engaged in what one of my former bosses referred to as the "Chipmunk Rodeo" - an annual family camping trip that dates back quite some time so I am told. A little fresh air, cold mountain river water, and Eastern Sierra dirt has never hurt anyone and I know I wouldn't miss this trip unless it absolutely could not be avoided. It's one of my favorite annual activities!
Seeing as my family is quite large, and like many families obsessed with making sure there is enough to eat, it can be hard to contribute to the festivities as much as I would like now that I'm grown (mostly). The last few years I've brought to camp my serious baking skills serving up some sweets that surpass or at least compliment the requisite s'mores.
All of the items are made ahead, made to travel well, and made to make sure we can camp in style. This year's menu had a delightful citrus yogurt pound cake, an off the cuff peach-blackberry pie (with oat crisp topping), and what might have been a few too many peanut butter/peanut butter cup cookies.
I'll be posting the recipes over the next few days so keep an eye on the blog, they're worth watching out for!
Wednesday, August 4, 2010
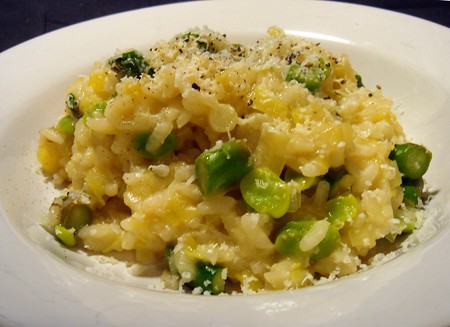
Cooking to Impress - Basic Risotto
I have been a bad blogger. I have been having a simultaneously very lazy and very busy summer and one of the things I've been lazy about is keeping up here. I also haven't been doing anything very exciting in the kitchen, so that could be a contributing factor, but mostly I've been lazy about posting.
This post is actually regarding a meal I made back in early May, but, unless you live in one of the places in America where you shut down your kitchen for three months due to heat exposure, it applies year round.
See, to me, Risotto is another one of those foods that are my favorite kind of food to make. It is both comforting and luxurious, homey and foreign, and impressive yet exceptionally simple to prepare. Risotto is also a very sexy food, the first time I ever made risotto was to impress a date. When the mood strikes I still make a mean risotto, and even if I'm only impressing myself, I'm worth it.
The most important thing to remember about risotto is to keep stirring so it won't stick. Risotto is infinitely adaptable. In the past I have made pink risotto with red wine and leftover lamb, and while writing this up I thought of trying a fall risotto with chicken, apples, and a sweeter white wine. As long as you keep in mind allium (onion/leek), acid (wine/lemon juice - I may have used tomato juice and some vinegar in the past), stock (to be really traditional add saffron to the warming stock), and grain (this technique can actually be applied to almost any whole grain) everything else is up to the imagination.
Basic Risotto
Joy of Cooking's recipe for Simplest Risotto (Risotto In Bianco) with notes for adaptation and additions.
1-2 Tbs butter or olive oil (or combination), plus 1/2 Tbs butter to finish
1/2 medium onion, diced or 2 small leeks, cut into thin 1/8" half moons
4 cups stock, chicken or veggie
1 cup Italian rice or standard, medium grain white rice
1/4 dry white wine or lemon juice
1/3-1/2 cup grated Parmesan cheese
salt and pepper to taste
Optional: 1-2 cups chopped, in season vegetables, cooked meat or seafood (great use for leftovers), additional cheese (great use for odds and ends left in the fridge), herbs, or chopped nuts
1) Heat the butter or oil in a large heavy pan and soften the onions or leeks. Sauce or saute pans both work, I like to use a deep 10" frying pan with curved sides (like a pseudo wok).
2) Heat the stock to a simmer and set aside.
3) To the butter/onion combination, add the rice and cook over medium. Stir continuously until the rice becomes translucent and you can see a white spot in the center or the rice.
4) When the rice is ready, add the wine and continue stirring. If using lemon juice, reserve until after adding stock.
5) Continuing to stir, begin adding stock approximately one cup at a time. Wait until all of the liquid is absorbed before adding the next cup. After the first three cups add the last of the stock 1/4 cup at a time. Rice is ready when it still has a little tooth to it. (This will take approximately 20 minutes)
6) If adding lemon juice, stir in now and let it absorb briefly. Fold in butter and Parmesan cheese. Add in other additions now as well and season to taste.
Notes on seasonal vegetables*:
Spring: parboiled/shelled favas, asparagus, spinach, peas;
Summer: basil, corn, tomatoes, squash, green beans;
Fall: hard squash, mushrooms, sweet potatoes;
Winter: kale, leeks, brussels sprouts
*depending on the vegetable, items may need to be pre-cooked before being added to the risotto. Prepared peas or favas can be added without further prep, asparagus/ may need to be steamed or sauteed depending on sized of pieces and thickness of stems, hard squashes will need to be cooked until soft. Some or all of heartier vegetables can be cooked with the risotto instead of being added at the end.

