I have been a bad blogger. I have been having a simultaneously very lazy and very busy summer and one of the things I've been lazy about is keeping up here. I also haven't been doing anything very exciting in the kitchen, so that could be a contributing factor, but mostly I've been lazy about posting.
This post is actually regarding a meal I made back in early May, but, unless you live in one of the places in America where you shut down your kitchen for three months due to heat exposure, it applies year round.
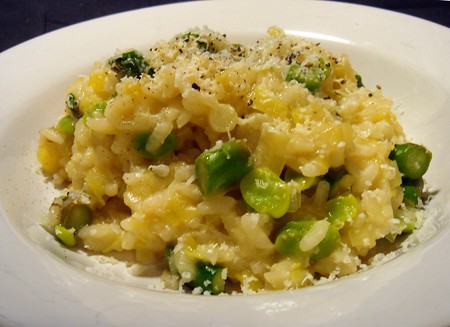
See, to me, Risotto is another one of those foods that are my favorite kind of food to make. It is both comforting and luxurious, homey and foreign, and impressive yet exceptionally simple to prepare. Risotto is also a very sexy food, the first time I ever made risotto was to impress a date. When the mood strikes I still make a mean risotto, and even if I'm only impressing myself, I'm worth it.
The most important thing to remember about risotto is to keep stirring so it won't stick. Risotto is infinitely adaptable. In the past I have made pink risotto with red wine and leftover lamb, and while writing this up I thought of trying a fall risotto with chicken, apples, and a sweeter white wine. As long as you keep in mind allium (onion/leek), acid (wine/lemon juice - I may have used tomato juice and some vinegar in the past), stock (to be really traditional add saffron to the warming stock), and grain (this technique can actually be applied to almost any whole grain) everything else is up to the imagination.
Basic Risotto
Joy of Cooking's recipe for Simplest Risotto (Risotto In Bianco) with notes for adaptation and additions.
1-2 Tbs butter or olive oil (or combination), plus 1/2 Tbs butter to finish
1/2 medium onion, diced or 2 small leeks, cut into thin 1/8" half moons
4 cups stock, chicken or veggie
1 cup Italian rice or standard, medium grain white rice
1/4 dry white wine or lemon juice
1/3-1/2 cup grated Parmesan cheese
salt and pepper to taste
Optional: 1-2 cups chopped, in season vegetables, cooked meat or seafood (great use for leftovers), additional cheese (great use for odds and ends left in the fridge), herbs, or chopped nuts
1) Heat the butter or oil in a large heavy pan and soften the onions or leeks. Sauce or saute pans both work, I like to use a deep 10" frying pan with curved sides (like a pseudo wok).
2) Heat the stock to a simmer and set aside.
3) To the butter/onion combination, add the rice and cook over medium. Stir continuously until the rice becomes translucent and you can see a white spot in the center or the rice.
4) When the rice is ready, add the wine and continue stirring. If using lemon juice, reserve until after adding stock.
5) Continuing to stir, begin adding stock approximately one cup at a time. Wait until all of the liquid is absorbed before adding the next cup. After the first three cups add the last of the stock 1/4 cup at a time. Rice is ready when it still has a little tooth to it. (This will take approximately 20 minutes)
6) If adding lemon juice, stir in now and let it absorb briefly. Fold in butter and Parmesan cheese. Add in other additions now as well and season to taste.
Notes on seasonal vegetables*:
Spring: parboiled/shelled favas, asparagus, spinach, peas;
Summer: basil, corn, tomatoes, squash, green beans;
Fall: hard squash, mushrooms, sweet potatoes;
Winter: kale, leeks, brussels sprouts
*depending on the vegetable, items may need to be pre-cooked before being added to the risotto. Prepared peas or favas can be added without further prep, asparagus/ may need to be steamed or sauteed depending on sized of pieces and thickness of stems, hard squashes will need to be cooked until soft. Some or all of heartier vegetables can be cooked with the risotto instead of being added at the end.
Wednesday, August 4, 2010
Cooking to Impress - Basic Risotto
Wednesday, June 2, 2010
Wednesday Night Chocolate Cake

Last week Susie, very correctly I might add, said that cake is a good way to say "hey, I like you." Cakes can be big or small, with lots of layers or just a few, and made with all manner of frosting, filling or ganache, but anyway you slice them, a cake will instantly let someone know that they are important.
Cake doesn't always need to be a big event or a big celebration though. Cake can also be a simple, quiet celebration, a good way to say "hey, I like me."
I am a firm believer in treating yourself, but I also believe that treating yourself doesn't have to involve a ton of dishes, hours of labor, and epic baking battles. I love a good challenge, but on a Wednesday night after a long day at work that was maybe a bit of a bummer, forty-five minutes is all I need to bring it back together.
Think of this cake as a meditation on dessert, an exercise in simplicity and subtlety. One bowl, one pan, and dessert can be an everyday affair, or maybe just a way to congratulate yourself on making it through the week.
Wednesday Night Chocolate Cake
Adapted from Hershey's "Perfectly Chocolate" Chocolate Cake
1 cup sugar
3/4 + 1/8 cups all-purpose flour, plus some for pan
3/8 cup cocoa powder
3/4 tsp baking powder
3/4 tsp baking soda
1/2 tsp salt
1 egg
1/2 cup milk
1/4 cup vegetable oil, plus some for pan
1 tsp vanilla extract
1/2 cup boiling water
1) Heat oven to 350°F. Grease one 9-inch round baking pan with oil, sprinkle in some flour and shake around to coat. Discard excess flour. (or make it really easy and spray with cooking spray with flour).
2) Stir together dry ingredients (sugar, flour, cocoa, baking powder, baking soda and salt) in a large bowl. Add wet ingredients (eggs, milk, oil and vanilla); beat with a whisk or wooden spoon until smooth. Stir in boiling water (batter will be thin). Pour batter into prepared pan.
3) Bake 30 to 35 minutes or until wooden pick inserted in center comes out clean. Cool 10 minutes; remove from pans to wire racks. Cool completely.
Serve with fresh berries, a spoonful of jam, a dusting of powdered sugar, and/or a tall, ice cold glass of milk.
Tuesday, May 25, 2010
The Heart of Darkness
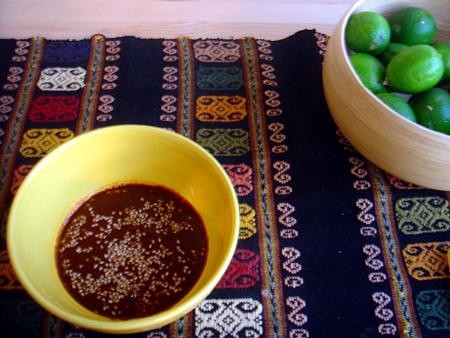
I love mole. I mean I REALLY love mole. I love all kinds of mole - red, yellow, black, sweet, savory, spicy whatever. I would consider bathing in mole if possible. I bet it would be great for the skin, if you didn't mind being slightly orange I mean.
As with most things in my life, I prefer not to settle when it comes to my mole. I'll give most restaurant's "mole" a try once, sure. But I'm not going back for seconds if it doesn't pass muster. When it came down to what to have for my birthday dinner I knew it was going to be mole, and I knew I was going to have to make it myself.
I have made mole only once before and it required a small army of assistants and an ENTIRE day. It has taken almost 5 years to take it on again, not necessarily because I was intimidated, but because if a sauce, not even a whole dish but a sauce, takes that much effort you need a pretty good reason to make it. I think my own birthday is reason enough, and this time I am older, I am wiser, and I have a lot more practice. With Chef Rick Bayless behind me I decided I was ready, and this time I was going to be going it alone.
I am not going to lie, this is by no means a "simple" recipe. This isn't even the REALLY involved Oaxacan black mole (some with upwards of 28-30 ingredients), it is only a mole rojo - a comparatively "easy" variety with only 18-20 ingredients. It is not, however, a very difficult recipe. Time consuming, maybe, but not difficult. I promise if you read it through, break it down, and take it slow, it can be done.
And it will be worth it.
Mole Rojo Clasico
Classic Red Mole
Adapted from Rick Bayless' Mexico One Plate at a Time
10 ounces (5 medium or 3 large) tomatillos, husked and rinsed
1 1/3 cup (about 6 1/2 ounces) sesame seeds
1 cup rich-tasting pork lard or vegetable oil, plus a little more if necessary
6 ounces dried mulato chiles, stemmed, seeded and torn into large flat pieces
8 ounces dried pasilla-ancho chiles, stemmed, seeded and torn into large flat pieces
8 garlic cloves, peeled
1 1/4 cup (about 5 ounces) whole almonds, with skin
1 cup (about 4 ounces) raisins
1 teaspoon Mexican canela, or regular cinnamon, ground
1/2 teaspoon black pepper, ground
1/2 teaspoon anise seed
1/4 teaspoon cloves, ground
1 bolillo or firm white roll, darkly toasted and broken into several pieces
2 ounces (about 2/3 of a 3.3-ounce tablet) Mexican chocolate
3 quarts chicken or vegetable broth (I only used 2, but good to have the full amount)
Salt
1/3 to 1/2 cup brown sugar
Prep the Ingredients
1) Measure out and prepare all your ingredients. I cannot stress this enough.
2) Stem and deseed the chiles and tear into large pieces if not already complete.
3) On a rimmed baking sheet or small baking pan lined with foil, roast the tomatillos 4 inches below a very hot broiler until splotchy black and thoroughly soft, about 5-10 minutes per side depending on size and broiler temp. Scrape into a large bowl.
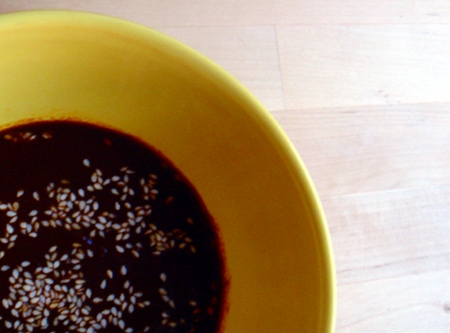
4) In a dry skillet over medium heat, toast the sesame seeds, stirringly continuously, until golden, about 5 minutes. Scrape half of them in with the tomatillos. Reserve the remainder for sprinkling on the chicken.
Brown and Soak the chiles
Turn on an exhaust fan or open a kitchen door or window for this part.
5) Fill a kettle with water to its highest level and put on to heat.
6) In a very large soup pot (I used a 7-quart enamel cast iron pot), heat your fat over medium.
7) When the oil is hot, fry the chiles, three or four pieces at a time, flipping them nearly constantly with tongs until their interior side has changed to a lighter color, about 20 or 30 seconds total frying time. Don’t toast so darkly that they begin to smoke—that would make the mole bitter.
8) As they’re done, remove them to a large bowl (not the tomatillo bowl), being careful to drain as much fat as possible back into the pot. Cover the toasted chiles with hot water from the kettle and let rehydrate 30 minutes, stirring occasionally to insure even soaking.
Brown the Other Ingredients
9) Remove any stray chile seeds left in the fat. With the pot still over medium heat, fry the garlic and almonds, stirring regularly, until browned (the garlic should be soft), about 5 minutes. With a slotted spoon, remove to the tomatillo bowl, draining as much fat as possible back into the pot.
10) Add the raisins to the hot pot. Stir for 20 or 30 seconds, until they’ve puffed and browned slightly. Scoop them out, draining as much of the fat as possible back into the pot, and add to the tomatillos.
-Set the pan aside off the heat.
11) To the tomatillo mixture, add the cinnamon, black pepper, anise, cloves, bread and chocolate. Add 2 cups water and stir to combine.
Blend, strain, cook
12) Into a large measuring cup, small stockpot, or pitcher, tip off the chiles’ soaking liquid. Taste the liquid: if it’s not bitter, reserve about 6 cups of the liquid. (if you’re short, add water to make up the shortfall). If bitter, pour it out and measure 6 cups water.
13) Scoop half of the chiles into a blender jar, pour in half of the soaking liquid (or water) and blend to a smooth puree. Press through a medium-mesh strainer into a large bowl; discard the bits of skin and seeds that don’t pass through the strainer. Repeat with the remaining chiles.
14) Return the pot to medium heat. When hot again, pour in the chile puree—it should sizzle sharply and, if the pan is sufficiently hot, the mixture should never stop boiling. Stir every couple of minutes until the chile puree has darkened and reduced to the consistency of tomato paste, about a half hour.
15) In two batches, blend the tomatillo mixture as smoothly as possible (you may need an extra 1/2 cup water to keep everything moving through the blades), then strain it in to the large bowl that contained the pureed chiles.
16) When the chile paste has reduced, add the tomatillo mixture to the pot and cook, stirring every few minutes until darker and thicker, 15 to 20 minutes.
Simmer
17) When the chile/tomatillo mixture has reduced, add the broth to the pot until it is the thickness of “cream soup.” Briskly simmer the mixture over medium to medium-low heat for about 2 hours for all the flavors to come together and mellow.
-If the mole thickens beyond the consistency of soup, add in more broth. If more liquid is needed to retain consistency, add water.
18) Taste and season the mole with salt (usually about 4 teaspoons) and the sugar.
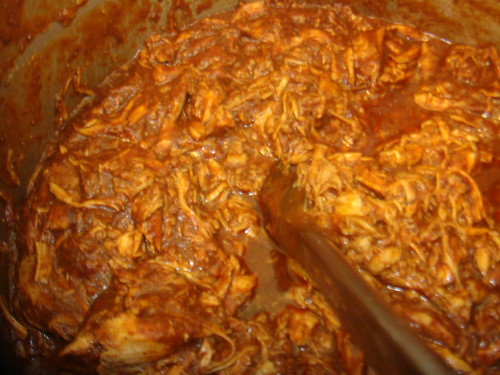
Serve
Pour over cooked chicken or turkey (I used shredded chicken to make it more party friendly/taco ready) or you can cool, cover and refrigerate until you're ready to use. When you're ready to use the mole, rewarm over medium-medium-low heat.
*This recipe can easily be adapted to be vegan/vegetarian by using vegetable oil/vegetable broth. Serve over Tofu, seitan, or your protein of choice.
**Rick suggests using a splatter screen to prevent some of the clean-up. I don’t have one, but I can heartily agree with his suggestion – I am still finding errant splatters of chile more than a week later.
Wednesday, May 19, 2010
Shades of Green
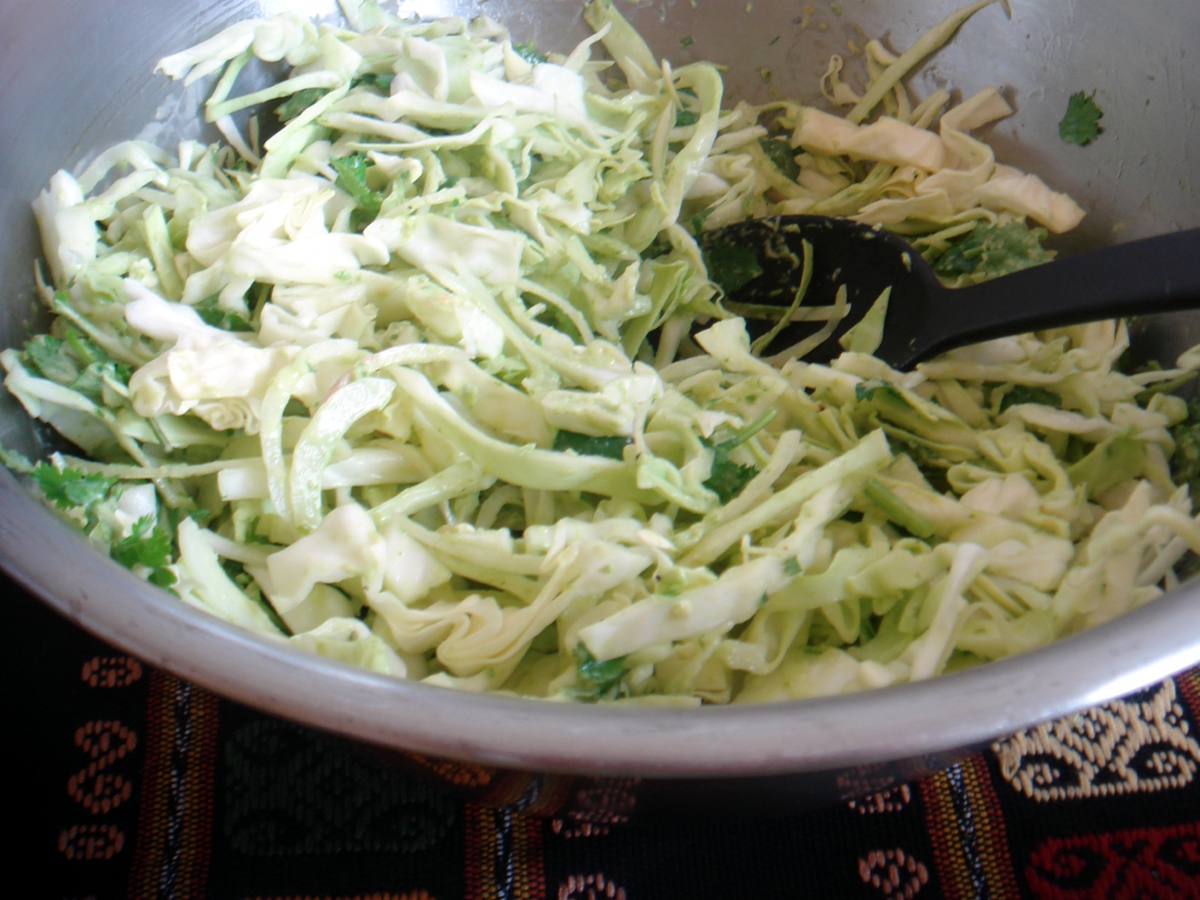
This slaw is just so good it would be cruel of me not to share. Cool, crisp, and fresh, it was the perfect foil to Sunday's dark, sweet, savory mole.
I hesitated to share this recipe because I didn't really do anything to it. But the fact of the matter is is that it is so simple and well crafted there isn't really anything to do to it. The only difference in the version I made versus the original recipe is that I used green cabbage instead of red (the store was sold out of red). I'm also including the size cabbage you should use, because a 'head' of cabbage can vary quite a bit.
Without further ado, Green Onion Slaw.
Green Onion Slaw
Recipe by Bobby Flay via Smitten Kitchen
Notes: Onion and cabbage can be prepped ahead of time and held in the fridge. The dressing will separate so it should be made just before serving as per SK's suggestion, though the ingredients can be measured/prepped ahead(chopping green onion, removing serrano stems). Leftovers can be kept a day or two in the fridge and retain flavor, but the dressing will separate and the texture will become less smooth.
1 cup green onions, coarsely chopped
1/4 cup red wine vinegar
2 serrano chiles, whole (do not de-seed), stems removed
2 tablespoons mayonnaise
Salt and pepper
1/2 cup pure olive oil
1 head cabbage, finely shredded (red or green, 1.5-2 lbs)
1 small red onion, halved and thinly sliced
1/4 cup chopped cilantro leaves
Blend green onions, vinegar, chiles, mayonnaise, salt, pepper and oil in a blender until emulsified. Place cabbage and red onions in a bowl, add the dressing and stir until combined. Fold in the cilantro and season with salt and pepper to taste. Read More......
Tuesday, May 4, 2010
Veggies with Flair
Not to get to stereotyped here on The Rose on Fire, but I thought that in honor of Cinco de Mayo I would post the instructiones for enchiladas. My most recent batch was vegetarian and sinfully delicious.
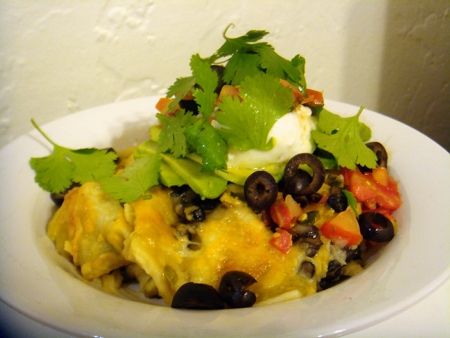
The best part about enchiladas is that they are so adaptable, and adaptable is my favorite kind of recipe. This time I used spinach, corn, black beans, and green sauce. Next time I may use chicken, cheese and red sauce. Vegetables, meat, cheese, sauce, the possibilities are endless.
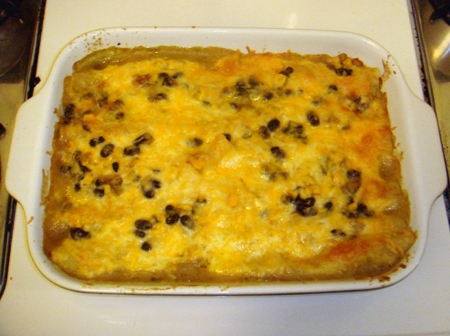
These are great for a party or a potluck, but are easy enough to be weeknight meal friendly. If you aren't making these to share you will receive the added bonus of leftovers. Don't feel too bad when you then find yourself the envy of the lunchroom. It's the little things that help you make it though the day.
Veggie Verde Enchiladas
This is really more of a method than a recipe. I am giving the specifics for the batch that I made but switch out any of the ingredients you like. Each enchilada will hold a just over a quarter cup of filling.
12 standard sized corn tortillas, yellow or white
1 15 oz can of green enchilada sauce
2 small onions (or 1 medium, or 1/2 large), 1/4 dice
3-4 cloves garlic, crushed
2 jalepenos, fine dice
10-16 oz (1 1b) spinach
1 15 oz can of black beans, drained and rinsed
1 7.5 oz can corn kernels, drained
1 tsp chile powder
8 oz cheese
Oil, vegetable, canola, or corn
Extras:
Cilantro
Salsa
Guacamole or Avocado
Sour Cream or Plain Yogurt
Black Olives
Create the filling
1) Begin to soften the onion over medium heat with a tablespoon or two of oil in a large frying pan. When onions begin to turn translucent, add garlic and jalapeno cook until all ingredients start to soften.
2) Add cleaned (and torn if necessary) spinach in large handfuls and cook until thoroughly wilted. Turn off heat.
3) In the frying pan if large enough, or in a large bowl add drained and rinsed beans and drained corn kernels to the spinach mixture and thoroughly combine.
Build the enchiladas
4) Spread a little oil and enchilada sauce on the bottom of a 13x9 baking dish. A couple heavy handed table spoons of each, to give yourself a base.
5) Heat a few more tablespoons of oil in a clean frying pan. Dip a tortilla in the oil (heated) for a few seconds on each side to soften it. The tortilla should be pretty pliable, but not falling apart. This may take some trial and error.
6) Place the heated tortilla in your baking dish flattened out and spread approximately 1/4 cup of the vegetable mixture somewhat evenly in a line across the center of the tortilla. Sprinkle on slightly less than a tablespoon of cheese.
7) Roll the tortilla around the filling and rotate so it lies seam side down. The rolls should be tight, but not too tight. You don’t want the filling to come out, but you don’t want the tortilla to break either.
8) Repeat steps 5-7 until your pan is filled.
Bake
9) Finish the pan by pouring your sauce (warmed a little is good) over the pan of enchiladas (make sure it is well covered, it is okay if you don't use the whole can). Sprinkle your remaining cheese on top.
10) Bake in the oven at 350F until the cheese is bubbly and melted and the edges turn a little brown.
Serve with your choice of toppings including cilantro, salsa, avocado, olives and/or sour cream. Leftovers can be reheated in the oven or microwave, or they can be pan-fried the next day and eaten for breakfast.
Friday, April 30, 2010
Long Lunches are Essential for Good Mental Health
People over time have developed a need for shelter. Weird, I know. Why on earth would we ever want to put a roof over our heads. Further more these roofs are not just there when we sleep! We go inside to work, to learn, to cook and eat, and to live. This is all fine and good, but just because we go around spending so much time inside and being thankful for the roofs over our heads doesn't mean that we can forget about the outside, and how beautiful it can be all on its own.

I admit that I don't get outside in the fresh air often enough. I do occasionally have to leave my bubble of 'inside' though, to go to an appointment in the middle of the day for example. If that day happens to be one of the first and few sunny days of spring, and the cherry blossoms just happen to be in bloom, I might decide to walk to my appointment.

Of course, if taking the long way back to the office happens to walk me right by a little Mexican/El Salvadoran restaurant from which I have been meaning to procure an oft talked about but never experienced Plantain Burrito, I might just have to take the wide arch back and grab a bite for lunch.
Cuco's in the Lower Haight is not actually very far from my office, but its far enough that I never went from work to Cuco's. This was a dumb move on my part, I didn't know what I was missing. Cuco's the type of hole in the wall place you would completely pass by if you weren't looking for it, but you should definitely be looking for it. Completely unassuming and not much more than a doorway from the outside, it also happens to be situated right next door to a rather unpleasantly scented carniceria. The two are not related. Thank goodness.

The plantain burrito at Cuco's may just be the best thing I have ever eaten. And I am including in that consideration things which are made with bacon. The perfect balance of chewy/sweet/soft plantains, salty/melty/gooey cheese, nutty rice, earthy black beans, and a pretty darn good salsa (light on tomatoes, heavy on onion and REALLY heavy on the jalapeno) - words cannot describe.

The only thing is though, that I am not sure that I can ever eat another one. See, the burrito was SOOO good that I know that the next time I have one there is no way it can ever be as good as the first time. This was the ultimate burrito experience, and everything else can only be second best.
I suppose I will just have to hold on to the memory of my first Cuco's plantain burrito and savor the sweet sweet taste of that first perfect bite on a sunshiny day in San Francisco. It's depressing really. Maybe a plantain burrito from Cuco's would make me feel better.
Wednesday, April 21, 2010
The Theory of Pie
Pie=pi, theory - math, get it? Gosh, I crack myself up.
No really, when it comes to baking, the theory of pie is pretty simple - make a crust, put something in it, cover it, or not, and bake (or not if you are looking at icebox pies filled with like pudding, or fresh fruit, but that's kind of a tangent - tangent, more math, man I'm good!)
The thing is, not all pies are created equal and what sounds good in theory can miss the mark in execution. Like this spinach and feta pie I made.

See, I told you I was on a pie kick.
The spinach and feta pie was something I had bumping around my brain since thinking up applications for the whole wheat and olive oil pie dough I made for the surprise birthday pie. Then there was a Swiss chard pie with olive oil pie dough in Everday Food (curse you Martha). Then I knew what I had to do. I took her basic recipe for the filling, added the Chocolate and Zucchini recipe for the dough (using the original recipe and not the sweet variation) added a little feta and wham! instant pie.
Well, it was pie. But it really wasn't ...mmm... pie... Here are some things that I think could be improved:
The Crust:
1) Use some all purpose flour, I think the texture came out a little too grainy. It wasn't noticable in a traditional usage, but when the folds double up in this galette style pie, it really becomes a prominent textural feature.
2) Roll the crust thinner. See the reasoning behind number 1.
3) Use less salt and better olive oil. The amount of salt called for in the recipe seemed to be a bit too much in practice, and my olive oil could have been fresher. When olive oil is one of the main flavor profiles of a recipe, it should probably be pretty decent olive oil.
The Filling:
1) Cook ingredients separately, and don't cook the lemon juice. The EDF filling recipe called for cooking the greens, pepper flakes, onions and garlic, taking off the heat, and THEN mixing in the lemon and Parmesan cheese but I didn't read the directions carefully enough or thought I could take a shortcut and the result was too acidic without really being recognizably lemony. I also added mushrooms. The combination of flavors just became muddy and nothing stood out, they all just tasted green and sharp. Valuable lesson: follow directions.
2) More garlic. When is this not a good idea?
3) More pepper flakes. See number 2.
4) Use full fat feta. I don't know what on earth possessed me to purchase low-fat feta. It is grainy and unpleasant. It doesn't fare well when baked either. Next time I will just suck it up and use the full-fat version. Its not that bad for you and it tastes SO much better.
5) I may play around with adding a bit of sweetener. The acid really needed a counterpoint. Maybe caramelizing the onions a bit more, or making them with balsamic vinegar and omitting the lemon would work. This fix is to be determined.
Baking:
1) Bake longer. I got gun shy and bits of my crust were a bit soft still. Wait till the whole thing is golden brown (which I have to say is hard to do when your dough is pretty brown to begin with.
2) Use a wash. This is really just for aesthetic reasons. The plain crust was really just a little sad. It would have benefited from a little shine.
There you go, not a perfect winner, but perfectly edible (I did end up eating the whole thing over the next two days) and a learning experience to boot. I think this one can be worked out, but we'll save the recipe till later then.
Monday, April 5, 2010
Wondercon 2010 Pregame: Thai Fighter
Wondercon brings people together. Its true. You never know who you are going to find yourself bonding with over the new movie or tv show preview, a shared disapproval of a particular story element or artist re-imagining of your favorite character, or the search for that hard to find volume in the 50% off trade stacks.


Friday night I found myself brought together with a family friend from Los Angeles, his girlfriend and another local friend from Oakland, and their friends from SF. Old and new, all enjoying a bit of shop talk, a bit of geeking out, some great Thai food, and a few really good vegan cinnamon cupcakes - complete with dino-decorations. Thanks Wondercon!
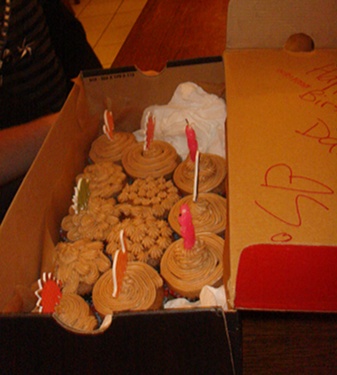

I really need to get the recipe for those cupcakes, especially the frosting. It never hurts to have a good vegan baked good recipe in your back pocket.

Also, I failed to take photos of any of the restaurant's food because 1) I forgot I had my camera until after dinner, and 2) if I had remembered, the battery burnt out on me after only 5 shots anyways. The restaurant was a great recommendation from the Los Angeles team's hotel front desk man. If you are in the area, Bang San Thai on O'Farrell is a solid eatery that has a large vegetarian/vegan section in addition to the regular meat based Thai classics. The Pad Kee Mao was delicious, and the pumpkin curry got rave reviews.
Friday, April 2, 2010
And Sometimes You're Just a Flaming Ball of Gas
There is no recipe tonight as I am turning in early to be fresh for Wondercon tomorrow. I feel like I have reached a right of passage of nerdom - my first con. I could almost cry (JK). So point is, I'm taking it easy. I posted a link this morning and I've got a little story for you tonight.
I've said it before and I'll say it again, Martha I am not. My first ever blog recipe was almost foiled (twice) because once because I left the onions burn while I was prepping other ingredients and once because I let it go too long in the braise while I was taking a bubble bath and a bit too much liquid cooked away.
I recently found a recipe for tomato sauce with which I am completely enamored. Its ridiculously simple - three ingredients - and it tastes amazing. It is also easily adapted to make some of the best tomato soup you will ever eat. The first time I made the sauce however I decided to cut the recipe in half so that it didn't make too much and because I only had half of the called for tomatoes.
I didn't account for the fact that half as much liquid probably wouldn't stand up to the required simmering and that perhaps I ought to add a bit of water to compensate. Setting my stove top as low as it could go, I put a lid on my pot and - here is where the learning experience will come in - I walked away. I thought it a bit odd that I could no longer hear the soft plop plop plopping of its thick simmer and that there was perhaps a faint sizzle, but I didn't think too much of it until I got the smell. The very distinctive smell of burnt food. Not just any burnt food, but burnt tomatoes and all their now "caramelized" sugar.
When I grabbed the pot off the fire I was pleased to see that it was just the edges and bottom that suffered. Without scraping the pot at all so as not to scrape up any burnt bits I poured the salvageable portion of the sauce into a clean pot and added a bit of water to thin it out. I did remember (barely) to snap a picture though before fully washing my new favorite stainless steel sauce pot.
Don't do what Janey Don't does do kids, and remember to pay attention in the kitchen! This time it was burnt tomatoes, but you never know when it may be a fingertip. Safety first!

Monday, March 29, 2010
Adventures Closer to Home
Friday night found me facing a quiet weekend at home for the first time in a few weeks. No classes, no social obligations, no work woes, and as I curled up on the couch with Jamie Oliver and a glass of white wine, the prospect of a weekend finishing up art projects and playing my guitar sounded pretty good.


Come Saturday afternoon I had succeeded in morning one of sleeping in and not much else when I get a call from this guy asking if he can crash on my couch before the Oakland Marathon on Sunday. Being an obliging sort of girl, as well as a supporter of athletes, and generally lacking in company for the evening I agreed. You won't regret it he says. Adventure and fun await he promises. There will be froyo he tells me. This all went against my homebody plans, but who turns down froyo?


Well adventure and fun did await, and I did not regret it. At least not until I had to get up at 7am on Sunday to get my friend to the race on time. First, we were off to a divey Alameda establishment hosting the first ever performance of "the Beatles." It was an art/music experience the likes of which I can honestly say I've never seen or heard before. After meeting new friends and coercing old friends to leave the comfort of their homes, we traveled onward and upwards to margaritas, froyo, and yet another questionable East Bay establishment, but really how questionable can you get in Alameda. A good time was had by all.

I ultimately failed in my own artistic and musical endeavors, but margaritas and froyo are ALWAYS a good idea. Plus, I did succeed in accomplishing a few things on Sunday so you can't say I was completely unproductive.
1) I got my friend to the race on time and picked him up again. Navigating downtown and the street closures around the lake really made this an accomplishment.
2) I ordered my new glasses. Considering that my current glasses are almost three years old, this is also quite the accomplishment.
3) Finally, I made a pretty dern good batch of waffles for marathon boy and his girlfriend Lyssette.

They weren't my favorite waffles, for that you need the Joy of Cooking and a LOT more butter, but these were a pretty good "healthy" substitute. Especially covered in syrup and served with a side of bacon.

And now I will reward you for your patience with the recipe.
Recovery Banana Wheat Waffles
Adapted from this recipe.
2 cups all-purpose flour
1 1/2 cups whole wheat flour
2 tbs baking powder
1/2 tsp salt
1/4 tsp freshly ground nutmeg
4 egg yolks
3 cups milk
1/4 cup canola oil
1/2 tsp vanilla extract
1 cup mashed banana (two large overripe bananas)
4 egg whites
1) Combine both flours, baking powder, salt and nutmeg in a large bowl.
2) In another bowl, beat egg yolks, milk, oil, and vanilla until just combined. Add mashed bananas and beat slightly longer to break up any remaining chunks of fruit.
3) Pour the flour mixture into the egg mixture and mix until just combined.
4) In another small (very clean/grease free) bowl, beat egg whites until stiff peaks form. Preferably with a mixer, but can be done by hand with patience.
5) Gently fold egg whites into the batter being careful not to over-mix.
6) Pour batter into your waffle iron according to manufacturer directions (amount of batter and grease vs. no grease). Bake according to the manufacturer directions with your iron. Makes hella waffles.
Thursday, March 18, 2010
Not Naan
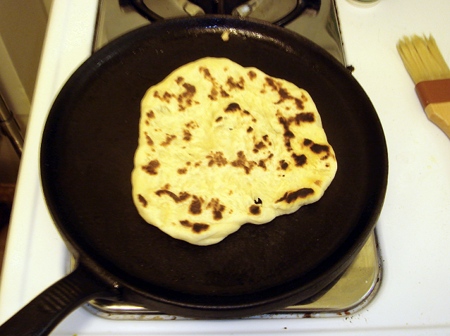
Much like my recipe from Tuesday was not Dal Masala, this grilled flat bread was not naan. It may not have been what I was expecting, but OH BOY was it tasty. I would say that it tasted a bit like soft pretzels - chewy, salty, and a hint of sweetness. I would have been perfectly happy to eat the whole batch with just some butter and salt, but I did end up using it as a foil for my spicy lentils when I had leftovers the next day. Indian Spiced Lentils and Not Naan, it was meant to be.
Not Naan
Based off of this recipe, adjusted for ingredients on hand, or not on hand
1/2 Package of Yeast (I used RapidRise, but I think you are supposed to use regular)
1/2 cup warm water
2 Tbs Sugar
1 egg
2 1/4 cups Flour
1 tsp salt
Optional:
Butter
Kosher Salt
Garlic Clove
1) Mix yeast and water, let stand 10 minutes. It should be frothy (though mine wasn't).
2) Add sugar, egg, salt, and flour. Mix to form a soft dough.
3) Knead on a floured surface until smooth, form into a ball, place in a well-oiled bowl, cover with a damp towel and let rise for an hour.
4) After dough has risen for an hour, it should have doubled in size, punch down and knead a few times. Break off into golf-ball sized pieces, roll, and place on a tray. Cover and let rise 30 minutes.
5) After 30 minutes sough should have again doubled in size. It is at this point where you may freeze the dough if you wish (or have gotten lazy and don't want to make your not naan anymore). If you are making your naan, preheat a griddle over high heat. Oil the surface, roll out your naan, and grill until brown on both sides. Flip frequently.
6) When finished rub with butter and sprinkle with kosher salt. Rub half a garlic clove on it if you wish.
Tuesday, March 16, 2010
Accidental Lentils
One of the themes of my blog is "accidentally on purpose" because even if things don't always turn out how you wanted them to, I tend to believe they turn out how they were meant to for better or worse.

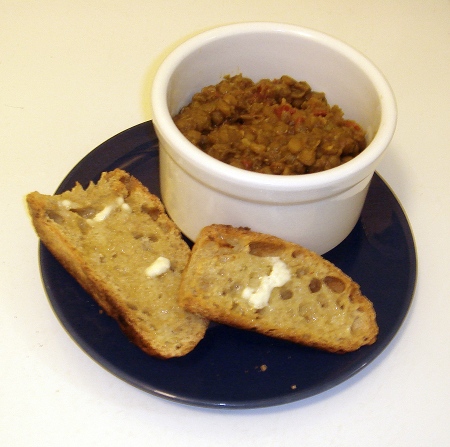
My attempt to recreate an Indian lentil dish, Dal Masala, turned out a bit like an American adaptation of a foreign film - all the elements are there, but its just not the same. In many cases viewers say that the American version is inferior to the original, but if you look at it as its own entity entirely, it may be campy, but it's still pretty enjoyable.

While I could say that my dish wasn't as good as the original, I am choosing to look at it as an entirely new product. The lentils were very good on their own, so why bring them down by comparing them to something they are not and can never be (at least until I find a local Indian grocer)? This dish is not a poor reproduction of Dal Masala, it's Indian Spiced Lentils, and it's delicious.
Indian Spiced Lentils
1 cup of Lentils
1/2 of a 28oz. can of diced Tomatoes
1/2 an Onion, diced to 1/4" pieces
2-3 Large Cloves of Garlic
1-2 Heaping Tablespoons of Curry Powder
1/4 tsp Mustard Seed, crushed
1/4 tsp Cumin Seed, crushed
1 Cinnamon Stick
2 Cardamom Pods
3-4 Chiles de Arbol (small red chiles)
5-10 shakes of Powdered Ginger (an approximate measurement)
Bay Leaf
Olive Oil
Vinegar - Milder White Vinegar, like White Wine or White Balsamic
Water
1) Pour several large glugs of Olive Oil into the bottom of a medium-large sized pot with a well-fitting lid, turn heat to medium.
2) When oil is hot, add diced onion. Brown the onion gently, as it starts to turn yellow add Curry Powder, Mustard Seed, Cumin Seed, Cinnamon, Cardamom, and garlic to the pot and continue to cook over medium heat to toast the spices.
3) When the onion is thoroughly softened and browned, and the spices are well toasted, add tomatoes, Ginger, and Bay Leaf. Stir with a wooden spoon, the acid in the tomatoes should deglaze the bottom of the pot.
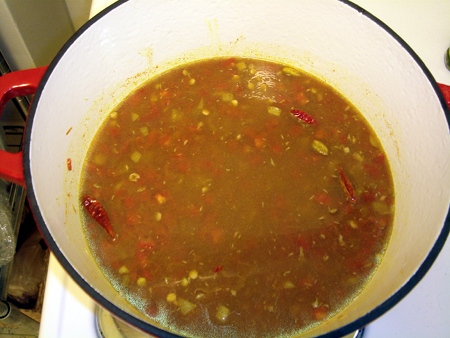
4) Add Lentils and water to cover plus an additional 1/2" of depth. Bring to a hearty simmer but do not boil, then turn down to medium-low, cover and check after 35 minutes for water level and doneness. If water level is low add enough to just cover, stir in and check again every 10-15 minutes.
5) When almost finished cooking to desired softness add salt to taste. Finish cooking (the lentils should hold their shape, but spread easily when squished and have the density of oatmeal, not soup) and serve with a splash of vinegar stirred in to brighten.
Tuesday, March 9, 2010
Sad Veggie Soup
I don't hold back on here so I am going to show you something most bloggers wouldn't, and its not going to be pretty. These veggies came out of my fridge on Friday. Before that they came from my CSA - three weeks ago.
Admit it, you've seen vegetables like this in your fridge. You bought them at the grocery, or the farmer's market, or were gifted with over abundance from a friend's yard and had the best of intentions that they would soon be a part of a delicious meal. But then work happens, and life happens, and take-out happens, and newer, fresher vegetables happen and suddenly you open up the vegetable drawer and find those sad, limp, brown around the edges shells of their former selves.
Not to worry though, these veggies may be sad now, but they will perk right up with a little tender loving care and a quick trim from a sharp knife. If you really needed to sharpen them up a quick shock in ice water can also help out, but for our purposes today I don't think that's necessary.

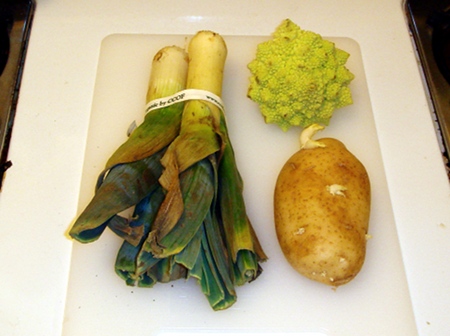
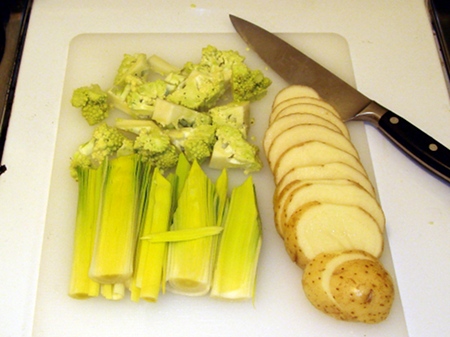
This recipe isn't much of a recipe. It is, as many of the things I cook are, extremely flexible and much more of a rough guide. I used leek, potato, and romanesco because its what I had.
If you have broccoli, cauliflower, spinach, mushrooms, corn, asparagus, or celery I am pretty sure it would work just as well. Just try to keep like veggies together, and go with your gut as to what would taste good. Corn and pepper would work well together for example.
Milk doesn't necessarily go with every combination, so you may exclude it if you like. If you don't use a starchy vegetable, like potato, you can thicken your soup with a mix of equal parts flour and butter (try one tablespoon of each to start) mashed together and mixed in to the hot soup after it has been pureed in the blender.
Sad Veggie Soup
2 Leeks, greens and any wilted layers removed
1 Small Head of Romanesco, trimmed
1 Medium Potato
3/4 cup Milk
1-2 tsp Dijon Mustard
Olive Oil
Salt
Pepper
Chile Powder
Jerk Seasoning*
*My Jerk mix is predominantly thyme with sugar, salt, allspice and chile. The combo added oomph to my soup that I wasn't getting, and worked with my veggies. Feel free to add whatever flavors float your boat and will go with your veggies. Rosemary, thyme, oregano, basil, and any of the other green herbs are good places to start.
1) Clean and prep the vegetables. Wash, trim off any wilted or brown areas, and cut into smaller pieces to speed cooking.
2) Cook your veggies. Drizzle the leeks and romanesco with olive oil, salt and pepper liberally, and roast at 425 degrees for 15-20 minutes. Cook the potato in a sauce pan with the milk and enough water to cover the potatoes. Simmer over medium heat until fork tender, approximately 10-15 minutes.
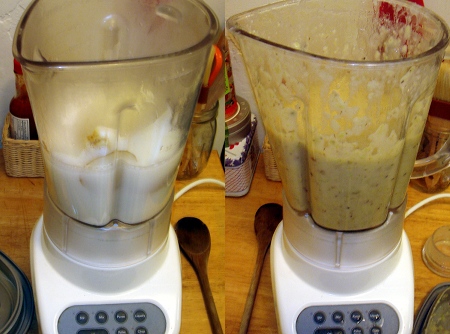
3) Blend the soup. Put the potatoes, leeks, and romanesco in a blender with a few splashes of the potato cooking liquid, enough to lubricate the mix. Go slowly, pulse on a lower setting before adding more liquid and speeding it up. Be careful as hot liquids expand in the blender and may explode or cause injury. Add liquid and blend until soup reaches the desired consistency.
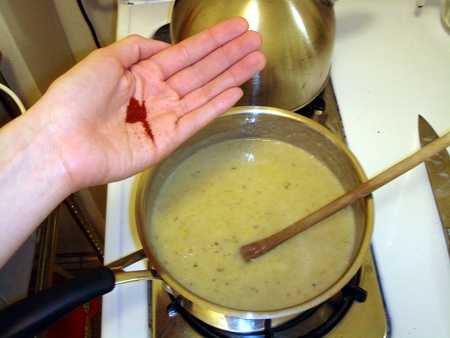
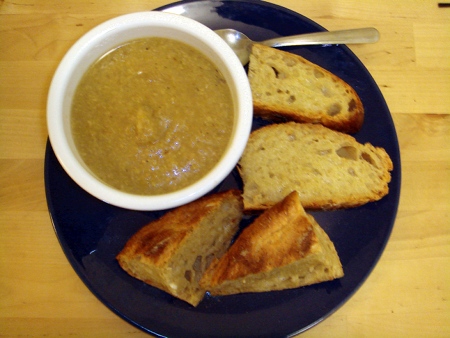
4) Season and Serve. Add the blended soup back into the potato pot and season to taste with mustard, chile powder, jerk seasoning, and additional salt and pepper. Enjoy.

