Today I bring you a very special guest post from the lovely Miss Susie-Q. Susie is quite the accomplished baker and was kind enough to make the PHENOMENAL cake we all enjoyed at my birthday party. I can't thank her enough still (for the cake and for helping wash the dishes after I sliced open my hand). Today is officially my last birthday related recipe so let's all sit back and enjoy a little cake.
If you ask me, cake is nature’s most perfect food. Okay, so maybe it leaves something to be desired from a nutritional standpoint, but whatever needs it fails to satisfy in the body, it more than makes up for with its ability to feed the soul. I do know people who dislike cake, but I am suspicious of them, in much the same way I would be suspicious of someone who doesn’t like birthdays or rainbows. Cake is celebration food. The point is not nutrition, but indulgence.
I have been baking for a long time. As a kid, my best friend would come over and we would pour over my mother’s cookbooks and after much deliberation and more than a little bickering, we would pick a recipe and spend the rest of the afternoon making it, then stuffing our faces. It should come as no surprise that I had a rather chubby adolescence. But as we entered different high schools, and drifted apart, I fell away from baking.
Then one foggy summer day, everything changed. I was working as a swim instructor. Berkeley doesn’t get real summers. It is typically terrible until about two in the afternoon, so I had essentially spent several hours trying to convince small children that they wanted to swim as they turned an increasingly unnerving shade of blue. And then there was cake. It was a coworker’s birthday, and they had picked up a sticky chocolate confection from a nearby bakery, and after the cold, uncomfortable and generally unpleasant morning, that cake was the best thing that could have possibly happened to me. I was hooked on cake. Every Thursday, for the next year, was Cake Day. I would come home on Wednesday evening to bake, and drag the cake around with me the following day, offering it to any and all takers until it was gone. There were chocolate cakes, pound cakes, a snickerdoodle cake, and as time went by, the recipes got more complex.

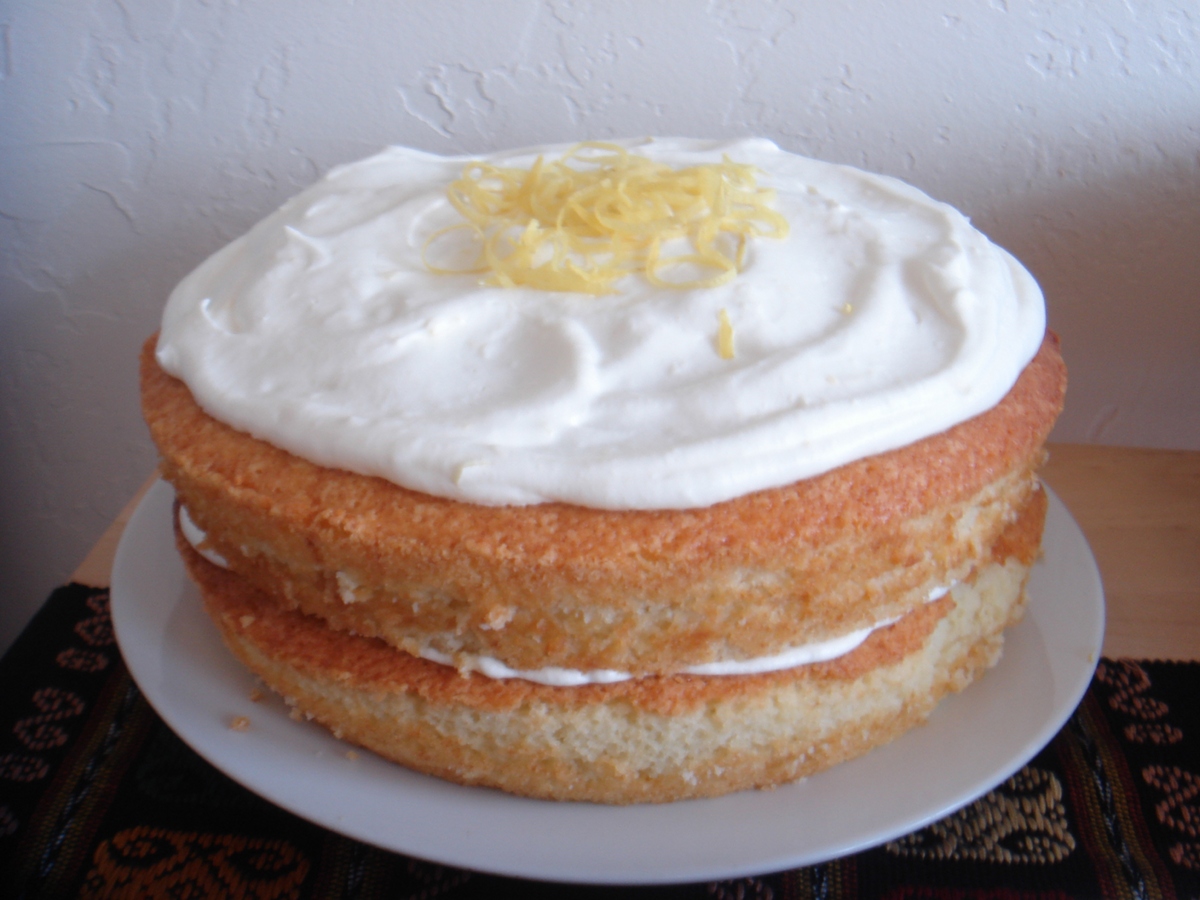
I’ve always felt that baking a cake is a great way to tell someone “hey, I like you.” So I was thrilled when Maya asked me to bake her a birthday cake. She had some very specific instructions: lemon cake, with lemon curd, and she didn’t like typical frostings, so it would have to be French meringue or whipped cream. I found a very highly rated lemon cake on epicurious.com, which was gluten-free (not necessary here). I found a recipe for whipped cream frosting, which needed to be stabilized. And I can’t eat eggs in any significant amount, so the lemon curd would be tricky. But all of those problems solved themselves. I made a substitution of both cake and regular unbleached flour for the rice flour and xanthan gum, figured out a good way to get the cream to keep its fluff, and Maya located a solid recipe for egg-free lemon curd, which I fixed up a smidge with some real butter for authenticity.
And so, after years of baking, and years of experimenting, I created my first original recipe. You won’t find it anywhere else, and it’s pretty amazing, if I do say so myself. Which I do.
I heartily concur.
Susie’s Lemon Cake
Cake:
1 cup canola oil
1 cup all purpose flour
1 1/2 cups cake flour
1/2 teaspoon salt
1 tablespoon baking powder
1 cup milk
1 teaspoon vanilla
1 tablespoon finely grated fresh lemon zest
2 cups granulated sugar
4 large eggs
Put oven rack in middle position and preheat oven to 350°F. Grease 9 inch round pans. Line bottom of each pan with a round of parchment or wax paper, then grease paper.
Whisk together flours, salt, and baking powder until combined well. Stir together milk, canola oil (1 cup), vanilla, and zest in another bowl.
Beat together sugar and eggs in a large bowl with an electric mixer at medium speed just until combined, about 1 minute. Reduce speed to low and add flour and milk mixtures alternately in batches, beginning and ending with flour mixture and mixing until just combined.
Divide batter evenly between cake pans, smoothing tops, and bake until a wooden pick or skewer inserted in center of each cake layer comes out clean, 30 to 35 minutes.
Cool cake layers in pans on racks 10 minutes. Run a thin knife around edge of 1 cake layer and remove from pan, placing on rack. Cool layers right side up. Repeat with second layer. Cool layers completely. Remove paper before frosting.
Lemon Curd:
1/4 cup cold water
1/2 cup sugar
3 Tbs Cornstarch
1/4 cup fresh lemon juice
2 tsp finely grated lemon zest
Pinch of salt
1-2 tbsp butter
In a saucepan, whisk together water, sugar, cornstarch, and salt until cornstarch is dissolved.
Bring mixture to a boil over medium-high heat, stirring constantly. When mixture thickens.
Reduce heat to low and cook for another minute, stirring constantly.
Pour mixture into a non-metallic bowl and add lemon juice and zest, mixing well. Add butter, mix.
Allow to cool and thicken at room temperature.
Can be refrigerated, covered, for several days. Before serving, beat thoroughly to a smooth, spreadable consistency.
Frosting:
1 tsp unflavored gelatin
4 tsp cold water
1 cup heavy whipping cream
1/4 cup confectioners' sugar
1/2 tsp lemon extract
zest of one lemon
Combine gelatin and cold water in small saucepan. Let stand until thick. Place over low heat, stirring constantly just until gelatin dissolves. Remove from heat and cool slightly. Whip cream, sugar, lemon extract and lemon zest until slightly thickened. While beating slowly, gradually add gelatin to whipped cream mixture. Whip at high speed until stiff.
Assembly
Cut cake layers in half, and spread lemon curd on bottom half, cut side up. Replace top half (cut side down).
Place one newly reassembled cake on cake plate, and spread generous amount (1 cup or so) of whipped cream frosting almost to edges.
Place second cake on top of the first, and mound remaining whipped cream on top.
Dig in.
Wednesday, May 26, 2010
L-L-L-Luscious Lemon Cake
Tuesday, May 25, 2010
The Heart of Darkness
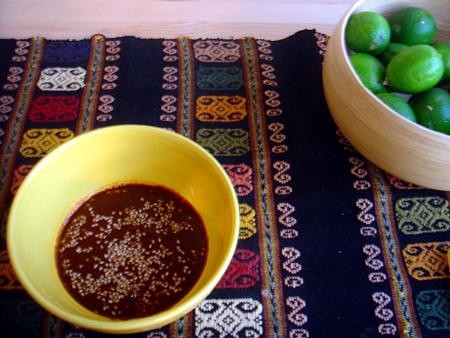
I love mole. I mean I REALLY love mole. I love all kinds of mole - red, yellow, black, sweet, savory, spicy whatever. I would consider bathing in mole if possible. I bet it would be great for the skin, if you didn't mind being slightly orange I mean.
As with most things in my life, I prefer not to settle when it comes to my mole. I'll give most restaurant's "mole" a try once, sure. But I'm not going back for seconds if it doesn't pass muster. When it came down to what to have for my birthday dinner I knew it was going to be mole, and I knew I was going to have to make it myself.
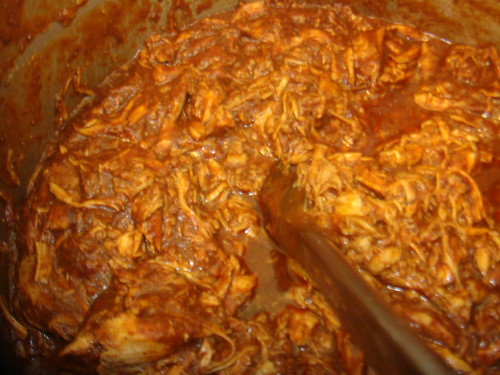
I have made mole only once before and it required a small army of assistants and an ENTIRE day. It has taken almost 5 years to take it on again, not necessarily because I was intimidated, but because if a sauce, not even a whole dish but a sauce, takes that much effort you need a pretty good reason to make it. I think my own birthday is reason enough, and this time I am older, I am wiser, and I have a lot more practice. With Chef Rick Bayless behind me I decided I was ready, and this time I was going to be going it alone.
I am not going to lie, this is by no means a "simple" recipe. This isn't even the REALLY involved Oaxacan black mole (some with upwards of 28-30 ingredients), it is only a mole rojo - a comparatively "easy" variety with only 18-20 ingredients. It is not, however, a very difficult recipe. Time consuming, maybe, but not difficult. I promise if you read it through, break it down, and take it slow, it can be done.
And it will be worth it.
Mole Rojo Clasico
Classic Red Mole
Adapted from Rick Bayless' Mexico One Plate at a Time
10 ounces (5 medium or 3 large) tomatillos, husked and rinsed
1 1/3 cup (about 6 1/2 ounces) sesame seeds
1 cup rich-tasting pork lard or vegetable oil, plus a little more if necessary
6 ounces dried mulato chiles, stemmed, seeded and torn into large flat pieces
8 ounces dried pasilla-ancho chiles, stemmed, seeded and torn into large flat pieces
8 garlic cloves, peeled
1 1/4 cup (about 5 ounces) whole almonds, with skin
1 cup (about 4 ounces) raisins
1 teaspoon Mexican canela, or regular cinnamon, ground
1/2 teaspoon black pepper, ground
1/2 teaspoon anise seed
1/4 teaspoon cloves, ground
1 bolillo or firm white roll, darkly toasted and broken into several pieces
2 ounces (about 2/3 of a 3.3-ounce tablet) Mexican chocolate
3 quarts chicken or vegetable broth (I only used 2, but good to have the full amount)
Salt
1/3 to 1/2 cup brown sugar
Prep the Ingredients
1) Measure out and prepare all your ingredients. I cannot stress this enough.
2) Stem and deseed the chiles and tear into large pieces if not already complete.
3) On a rimmed baking sheet or small baking pan lined with foil, roast the tomatillos 4 inches below a very hot broiler until splotchy black and thoroughly soft, about 5-10 minutes per side depending on size and broiler temp. Scrape into a large bowl.
4) In a dry skillet over medium heat, toast the sesame seeds, stirringly continuously, until golden, about 5 minutes. Scrape half of them in with the tomatillos. Reserve the remainder for sprinkling on the chicken.
Brown and Soak the chiles
Turn on an exhaust fan or open a kitchen door or window for this part.
5) Fill a kettle with water to its highest level and put on to heat.
6) In a very large soup pot (I used a 7-quart enamel cast iron pot), heat your fat over medium.
7) When the oil is hot, fry the chiles, three or four pieces at a time, flipping them nearly constantly with tongs until their interior side has changed to a lighter color, about 20 or 30 seconds total frying time. Don’t toast so darkly that they begin to smoke—that would make the mole bitter.
8) As they’re done, remove them to a large bowl (not the tomatillo bowl), being careful to drain as much fat as possible back into the pot. Cover the toasted chiles with hot water from the kettle and let rehydrate 30 minutes, stirring occasionally to insure even soaking.
Brown the Other Ingredients
9) Remove any stray chile seeds left in the fat. With the pot still over medium heat, fry the garlic and almonds, stirring regularly, until browned (the garlic should be soft), about 5 minutes. With a slotted spoon, remove to the tomatillo bowl, draining as much fat as possible back into the pot.
10) Add the raisins to the hot pot. Stir for 20 or 30 seconds, until they’ve puffed and browned slightly. Scoop them out, draining as much of the fat as possible back into the pot, and add to the tomatillos.
-Set the pan aside off the heat.
11) To the tomatillo mixture, add the cinnamon, black pepper, anise, cloves, bread and chocolate. Add 2 cups water and stir to combine.
Blend, strain, cook
12) Into a large measuring cup, small stockpot, or pitcher, tip off the chiles’ soaking liquid. Taste the liquid: if it’s not bitter, reserve about 6 cups of the liquid. (if you’re short, add water to make up the shortfall). If bitter, pour it out and measure 6 cups water.
13) Scoop half of the chiles into a blender jar, pour in half of the soaking liquid (or water) and blend to a smooth puree. Press through a medium-mesh strainer into a large bowl; discard the bits of skin and seeds that don’t pass through the strainer. Repeat with the remaining chiles.
14) Return the pot to medium heat. When hot again, pour in the chile puree—it should sizzle sharply and, if the pan is sufficiently hot, the mixture should never stop boiling. Stir every couple of minutes until the chile puree has darkened and reduced to the consistency of tomato paste, about a half hour.
15) In two batches, blend the tomatillo mixture as smoothly as possible (you may need an extra 1/2 cup water to keep everything moving through the blades), then strain it in to the large bowl that contained the pureed chiles.
16) When the chile paste has reduced, add the tomatillo mixture to the pot and cook, stirring every few minutes until darker and thicker, 15 to 20 minutes.
Simmer
17) When the chile/tomatillo mixture has reduced, add the broth to the pot until it is the thickness of “cream soup.” Briskly simmer the mixture over medium to medium-low heat for about 2 hours for all the flavors to come together and mellow.
-If the mole thickens beyond the consistency of soup, add in more broth. If more liquid is needed to retain consistency, add water.
18) Taste and season the mole with salt (usually about 4 teaspoons) and the sugar.
Serve
Pour over cooked chicken or turkey (I used shredded chicken to make it more party friendly/taco ready) or you can cool, cover and refrigerate until you're ready to use. When you're ready to use the mole, rewarm over medium-medium-low heat.
*This recipe can easily be adapted to be vegan/vegetarian by using vegetable oil/vegetable broth. Serve over Tofu, seitan, or your protein of choice.
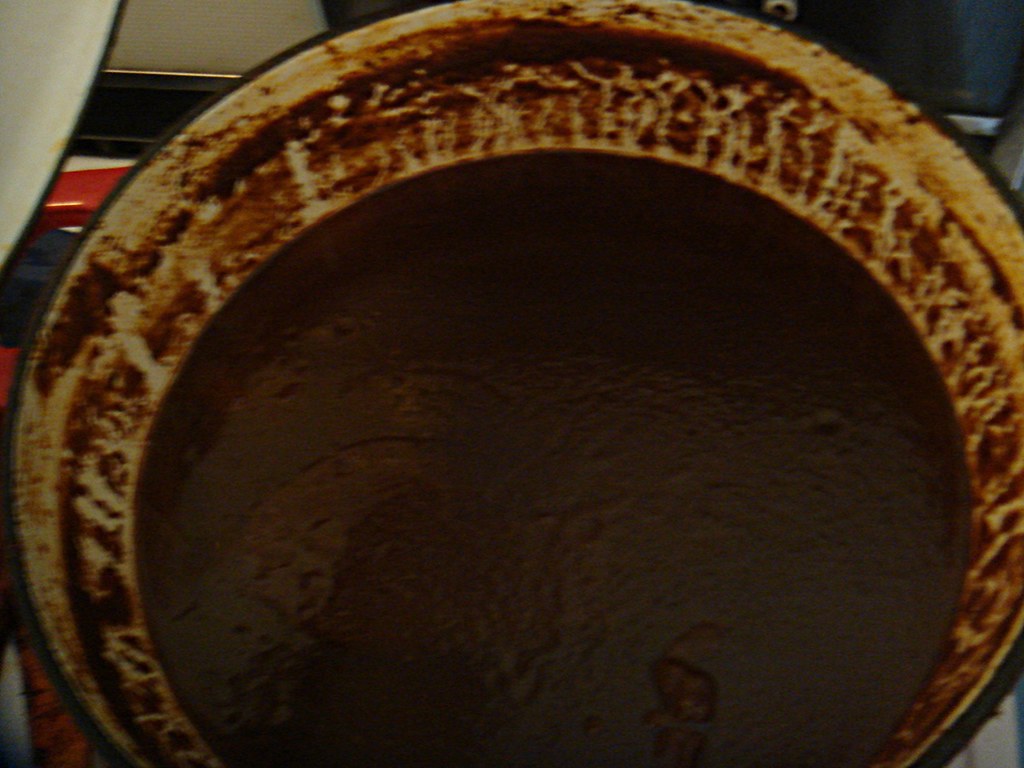
**Rick suggests using a splatter screen to prevent some of the clean-up. I don’t have one, but I can heartily agree with his suggestion – I am still finding errant splatters of chile more than a week later.
Wednesday, May 19, 2010
A Note on Saftey

Full disclosure in regards to my post on the slaw requires that I tell you when shredding the cabbage I was having trouble removing the particularly thick core. I pushed the knife down too hard and had my finger stabilizing the cabbage from the wrong place. I put a good 3/4" wide chop solidly into my left index finger.
I briefly considered going to the hospital to get stitches but ended up deciding on basic home first aid. In the end all was well, minus the awkward bandage and inability to chop anything else or wash dishes due to a lack of a hand.
Accidents happen, but remember, you are not an ingredient or a seasoning. Be careful, go as slowly as you need to, and BE CAREFUL. Better to burn something or get dinner on the table a little late than lose a finger. It's also a good idea to keep a first aid kit in the kitchen and know some basic first aid for cuts and burns. Hopefully you won't need it, but it will certainly come in handy when you do.
First aid graphic is free clip art. Read More......
Shades of Green
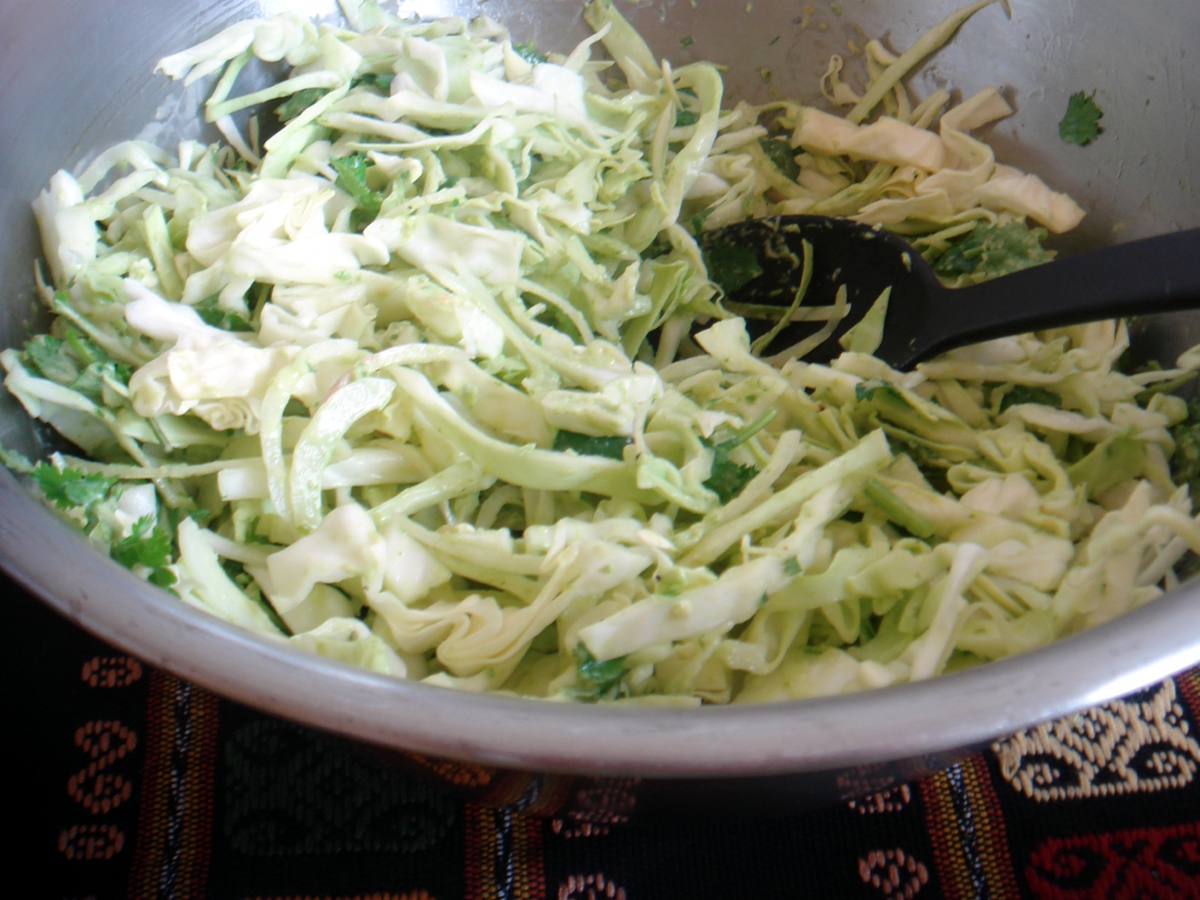
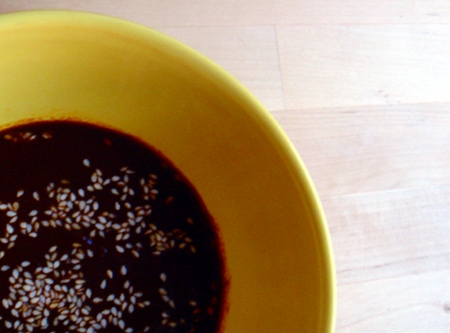
This slaw is just so good it would be cruel of me not to share. Cool, crisp, and fresh, it was the perfect foil to Sunday's dark, sweet, savory mole.
I hesitated to share this recipe because I didn't really do anything to it. But the fact of the matter is is that it is so simple and well crafted there isn't really anything to do to it. The only difference in the version I made versus the original recipe is that I used green cabbage instead of red (the store was sold out of red). I'm also including the size cabbage you should use, because a 'head' of cabbage can vary quite a bit.
Without further ado, Green Onion Slaw.
Green Onion Slaw
Recipe by Bobby Flay via Smitten Kitchen
Notes: Onion and cabbage can be prepped ahead of time and held in the fridge. The dressing will separate so it should be made just before serving as per SK's suggestion, though the ingredients can be measured/prepped ahead(chopping green onion, removing serrano stems). Leftovers can be kept a day or two in the fridge and retain flavor, but the dressing will separate and the texture will become less smooth.
1 cup green onions, coarsely chopped
1/4 cup red wine vinegar
2 serrano chiles, whole (do not de-seed), stems removed
2 tablespoons mayonnaise
Salt and pepper
1/2 cup pure olive oil
1 head cabbage, finely shredded (red or green, 1.5-2 lbs)
1 small red onion, halved and thinly sliced
1/4 cup chopped cilantro leaves
Blend green onions, vinegar, chiles, mayonnaise, salt, pepper and oil in a blender until emulsified. Place cabbage and red onions in a bowl, add the dressing and stir until combined. Fold in the cilantro and season with salt and pepper to taste. Read More......
Tuesday, May 18, 2010
It's My Party and I'll Die if I Want To

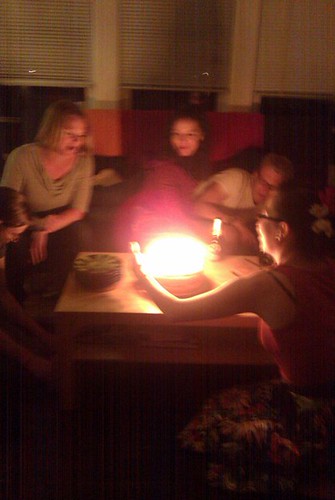
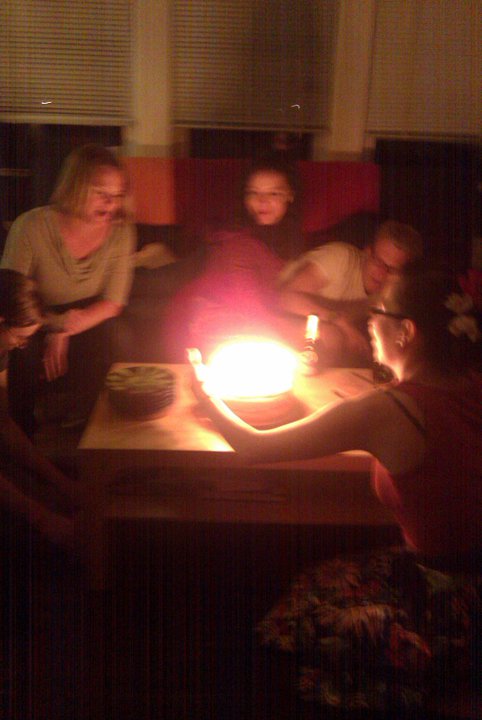
Mi casa es su casa on Sunday, May 16th, for a low-key and informal celebration of my 25th birthday. There will be food. There will be music. There will be drinks. There will be board games. There may even be cake.
Please bring yourself, your empty stomach, and something to share.
Yes, that is correct, I recently had a little birthday and Sunday was my party. There was food, games, laughter, and a minimum of bloodshed (more about that next time). It was an intimate gathering of friends and exactly what I wanted. A BIG thank you to all my friends who were there and there in spirit.
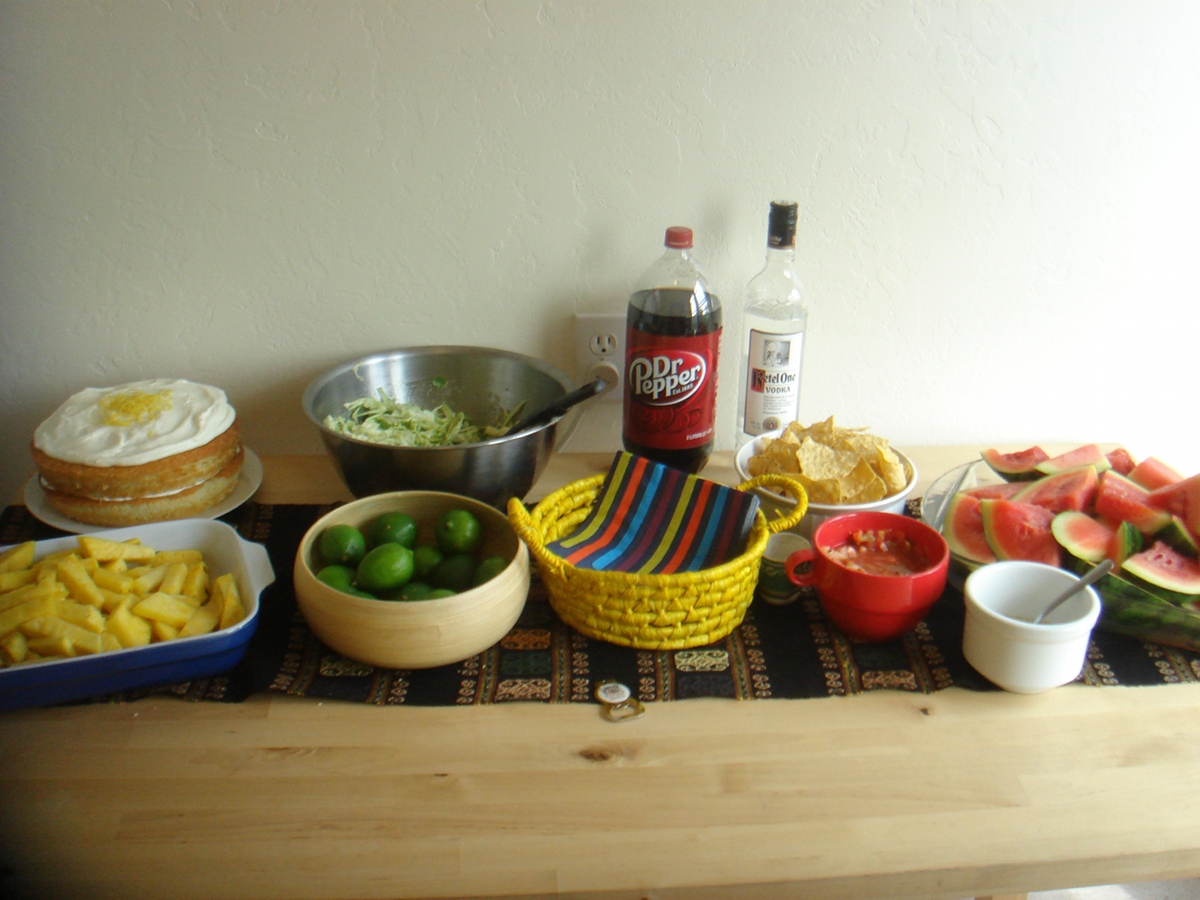


It was a great fiesta and I got to do two of my favorite things - cook, and feed people. Look for the slaw and mole recipes later this week.
*All photos of people courtesy of J. Buchleitner (because I forgot to take pics after we ate). Opening picture is a found image - I cannot seem find this image again or its owner. If this is your image please let me know if you would like me to take it down, if it is okay to leave up please let me know how to credit you! Read More......
Tuesday, May 11, 2010
Death by Caramel (and Chocolate)
I don't really like chocolate. How can you not like chocolate you may ask? Chocolate is nice, but most chocolate just bores me. When I do want chocolate though, I want it rich, dark, and bitter, like moist earth. You can describe my favorite coffee similarly. I usually prefer my chocolate in small, "just right" sized proportions and I prefer that it not stand alone. I love the bitterness to be offset by a bite of sweetness from a piece of fruit, or the toothsome meatiness of a bit of nut.
Of course there is another way to go.
Caramel. Sweet, silky, luxurious caramel. Soft, chewy, buttery, caramelized caramel. Caramel and a hint of spice. Dulce de leche caramel. Pair it with dark 70% or higher chocolate, and you are headed towards a mighty fine dessert.
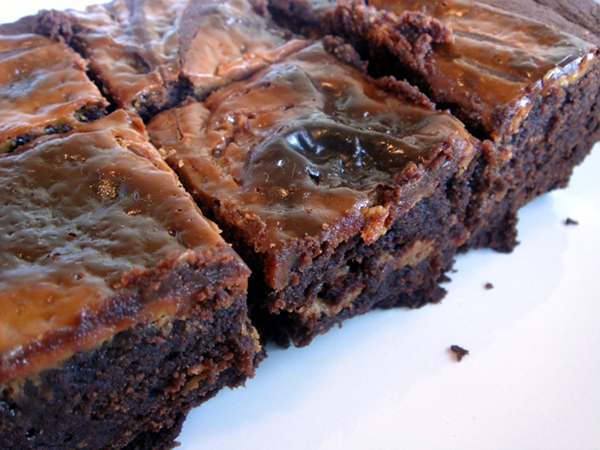
I recently had the opportunity to make a batch of brownies as a going away gift for a coworker friend of mine. I think the brownies I came out with may not have been what the rest of my coworkers expected, but I certainly enjoyed them and I think the departing friend did as well which is enough for me.

Actually, to be perfectly honest, I may have found myself trying not to lick a tin can, and instead hunting down every food item in the house that would taste good with the residual batter in the bowl or the residual caramel in the measuring cup, particularly the caramel, after making these brownies. They are THAT good.
I started with David Lebovitz' recipe for dulce de leche brownies. Then I adapted. Because its what I do. A touch of extra vanilla here, a sprinkle of ground canella (Mexican cinnamon) there, and replacing the regular chocolate with 50% extra-dark and 50% Mexican chocolate, the last of my stash from Oaxaca.
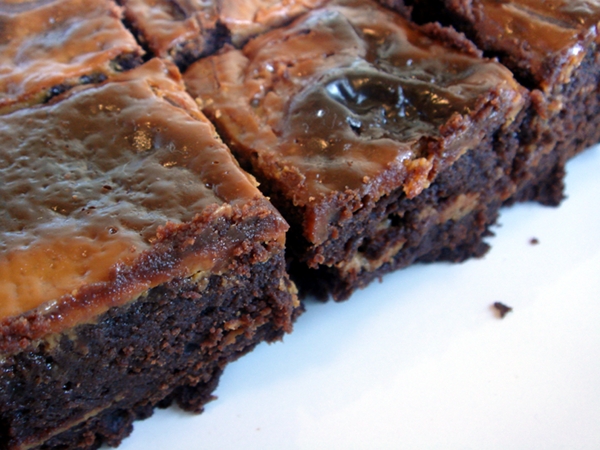
The next time you are in need of some serious chocolate, a dessert that doesn't soft shoe around, try these brownies. Cut them into small squares, and have just one (or two, or three - whatever is just right for you) with a cold glass of milk, a nice cup of coffee, or even a glass of red wine. If you're looking for death by chocolate, there are worse ways you could go.
Dulce de Leche Brownies
10.5 Tbs butter, plus extra to grease the pan
4 oz. dark chocolate
4 oz. Mexican chocolate
1/3 cup cocoa powder
4 eggs
1 1/3 cups sugar
1.5 tsp vanilla (I may have run out of vanilla and used half vanilla/half dark rum)
1.5 tsp cinnamon, preferably ground canela
1 1/3 cups flour
1/2 cup heavy cream
1 1/3 cups Dulce de Leche*
1) Line a 13x9in pan with a long sheet of aluminum foil that covers the bottom and reaches up the sides. If it doesn't reach all the way up and over the sides, use two overlapping sheets of foil. Grease the bottom and sides of the foil with some butter or non-stick spray.
2) Melt the butter in a medium saucepan. Add the chocolate pieces and stir constantly over very low heat until the chocolate is melted. Remove from heat and whisk in the cocoa powder until smooth.
3) Add in the eggs one at a time, then stir in the sugar, vanilla, cinnamon, and then the flour.
4) Spread half of the batter into the prepared pan. Drop one-third of the Dulce de Leche evenly over the brownie batter and drag a knife through to swirl it slightly. Spread the remaining brownie batter over, then drop spoonfuls of the remaining Dulce de Leche in dollops over the top of the brownie batter. Use a knife to swirl the Dulce de Leche slightly.
5) Bake in a 350 degree oven for 35 to 45 minutes. The brownies should feel just-slightly firm when done. Remove from the oven and cool completely.
According to David, these brownies become better the second day, and will keep well for up to 3 days.
*To make your own dulce de leche at home, take one 14oz can of sweetened condensed milk, remove the label, and cut two holes in the top with a can opener. Place in a medium sauce pan and fill saucepan with water one inch from the rim of the can. Simmer over medium-low heat for 2-4 hours depending on how thick you want your caramel (I used about 2.5 hours for the caramel in these brownies), refilling water as necessary. One 14oz can makes just enough caramel for the brownies.
Tuesday, May 4, 2010
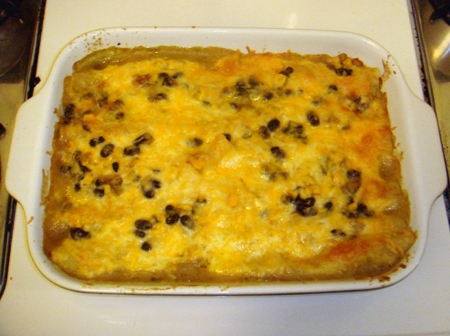
Veggies with Flair
Not to get to stereotyped here on The Rose on Fire, but I thought that in honor of Cinco de Mayo I would post the instructiones for enchiladas. My most recent batch was vegetarian and sinfully delicious.
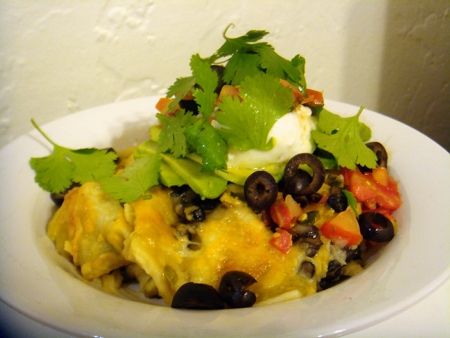
The best part about enchiladas is that they are so adaptable, and adaptable is my favorite kind of recipe. This time I used spinach, corn, black beans, and green sauce. Next time I may use chicken, cheese and red sauce. Vegetables, meat, cheese, sauce, the possibilities are endless.
These are great for a party or a potluck, but are easy enough to be weeknight meal friendly. If you aren't making these to share you will receive the added bonus of leftovers. Don't feel too bad when you then find yourself the envy of the lunchroom. It's the little things that help you make it though the day.
Veggie Verde Enchiladas
This is really more of a method than a recipe. I am giving the specifics for the batch that I made but switch out any of the ingredients you like. Each enchilada will hold a just over a quarter cup of filling.
12 standard sized corn tortillas, yellow or white
1 15 oz can of green enchilada sauce
2 small onions (or 1 medium, or 1/2 large), 1/4 dice
3-4 cloves garlic, crushed
2 jalepenos, fine dice
10-16 oz (1 1b) spinach
1 15 oz can of black beans, drained and rinsed
1 7.5 oz can corn kernels, drained
1 tsp chile powder
8 oz cheese
Oil, vegetable, canola, or corn
Extras:
Cilantro
Salsa
Guacamole or Avocado
Sour Cream or Plain Yogurt
Black Olives
Create the filling
1) Begin to soften the onion over medium heat with a tablespoon or two of oil in a large frying pan. When onions begin to turn translucent, add garlic and jalapeno cook until all ingredients start to soften.
2) Add cleaned (and torn if necessary) spinach in large handfuls and cook until thoroughly wilted. Turn off heat.
3) In the frying pan if large enough, or in a large bowl add drained and rinsed beans and drained corn kernels to the spinach mixture and thoroughly combine.
Build the enchiladas
4) Spread a little oil and enchilada sauce on the bottom of a 13x9 baking dish. A couple heavy handed table spoons of each, to give yourself a base.
5) Heat a few more tablespoons of oil in a clean frying pan. Dip a tortilla in the oil (heated) for a few seconds on each side to soften it. The tortilla should be pretty pliable, but not falling apart. This may take some trial and error.
6) Place the heated tortilla in your baking dish flattened out and spread approximately 1/4 cup of the vegetable mixture somewhat evenly in a line across the center of the tortilla. Sprinkle on slightly less than a tablespoon of cheese.
7) Roll the tortilla around the filling and rotate so it lies seam side down. The rolls should be tight, but not too tight. You don’t want the filling to come out, but you don’t want the tortilla to break either.
8) Repeat steps 5-7 until your pan is filled.
Bake
9) Finish the pan by pouring your sauce (warmed a little is good) over the pan of enchiladas (make sure it is well covered, it is okay if you don't use the whole can). Sprinkle your remaining cheese on top.
10) Bake in the oven at 350F until the cheese is bubbly and melted and the edges turn a little brown.
Serve with your choice of toppings including cilantro, salsa, avocado, olives and/or sour cream. Leftovers can be reheated in the oven or microwave, or they can be pan-fried the next day and eaten for breakfast.

