
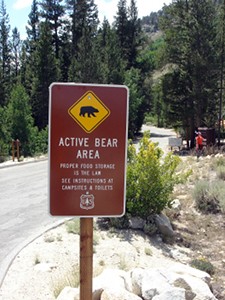
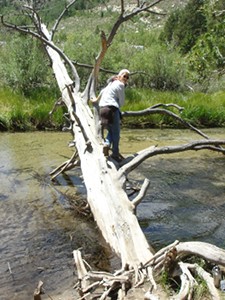
Earlier this month I engaged in what one of my former bosses referred to as the "Chipmunk Rodeo" - an annual family camping trip that dates back quite some time so I am told. A little fresh air, cold mountain river water, and Eastern Sierra dirt has never hurt anyone and I know I wouldn't miss this trip unless it absolutely could not be avoided. It's one of my favorite annual activities!
Seeing as my family is quite large, and like many families obsessed with making sure there is enough to eat, it can be hard to contribute to the festivities as much as I would like now that I'm grown (mostly). The last few years I've brought to camp my serious baking skills serving up some sweets that surpass or at least compliment the requisite s'mores.


All of the items are made ahead, made to travel well, and made to make sure we can camp in style. This year's menu had a delightful citrus yogurt pound cake, an off the cuff peach-blackberry pie (with oat crisp topping), and what might have been a few too many peanut butter/peanut butter cup cookies.
I'll be posting the recipes over the next few days so keep an eye on the blog, they're worth watching out for!
Wednesday, August 18, 2010
Cookies, Cakes, and Pie - Oh My!
Sunday, July 11, 2010
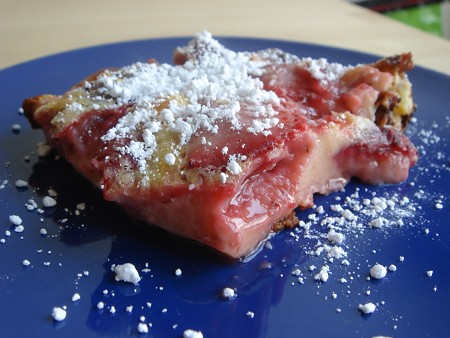
Oddly Named Desserts: Strawberry Flognarde
Hello again dear readers. I know you've been waiting with bated breath for my return, and no, I have not abandoned you. I just took a little vacation and while on this vacation I came upon the realization that some of the best things I can do are to keep cooking, keep writing, and keep busy. Oh, and eat a lot of dessert, too!
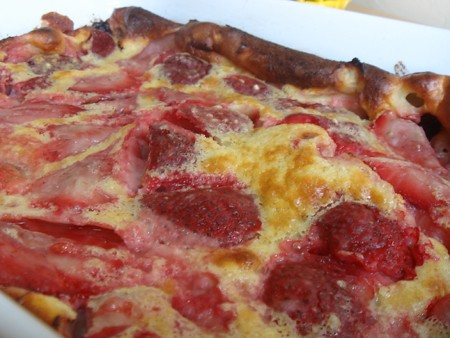
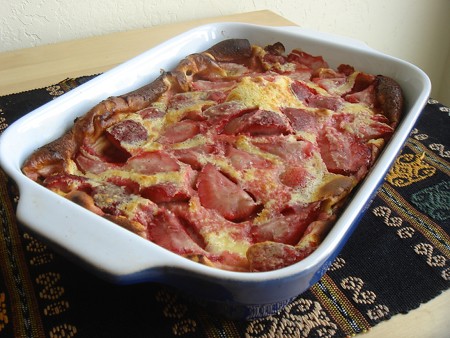
Today's sweet tooth tempting taste treat is a Strawberry Flognarde. A flognarde is a brilliantly simple dessert that looks impressive but is really just a thick custardy crepe with fruit baked in. If I had made it with cherries it would be called a clafoutis, but as it stands it is a flognarde. Enjoy that tidbit of culinary trivia while you tuck in.
Strawberry Flognarde
Adapted from The Dinner Files recipe for clafoutis
3 eggs
1 cup milk
1/2 cup flour
1/3 cup sugar
1/8 teaspoon salt
1 teaspoon vanilla
The better part of 1 lb. of strawberries
2-3 Tbs. of orange liqueur or orange juice
Powdered sugar for garnish (optional)
1) Pre-heat the oven to 350 degrees Fahrenheit and butter a baking dish approx. 9x13 inches (a tad smaller will make it thicker - yum, larger will make it thinner).
2) If the berries are on the small side leave them whole, if they are larger cut them into quarters or eighths, and place in a bowl large enough to accommodate stirring all the berries. Sprinkle with a tablespoon or two of the sugar, the orange liqueur or juice, and a tablespoon or two of flour and stir briefly to coat.
3) Whisk together in a separate bowl the eggs and milk (may be done in a blender). Add remaining flour, sugar, salt, and vanilla and whisk (or blend) until a smooth batter.
4) Spread the berries evenly around the baking dish and pour the batter over the berries, place in the oven and bake until the batter is set and the edges begin to brown, approx. one hour (start checking at about 45 minutes if, like me, your oven runs hot and cold on you).
5) Let cool a few minutes and slice into pieces. Dust with powdered sugar if so desired.
**In an effort to speed up the pre-heating process I started my oven at about 450 and accidentally left it there. My flognarde was well on the done side of life after only about 25 minutes and seemed to suffer no ill effect, but in any case I recommend cooking it the way it was intended - slow and steady.
**Also, my berries were VERY ripe, and the whole thing ended up a tad sweeter than I may have liked. If your fruit is also a bit sweet you may try using a squeeze of lemon in with the berries or omitting the powdered sugar.
Saturday, June 5, 2010
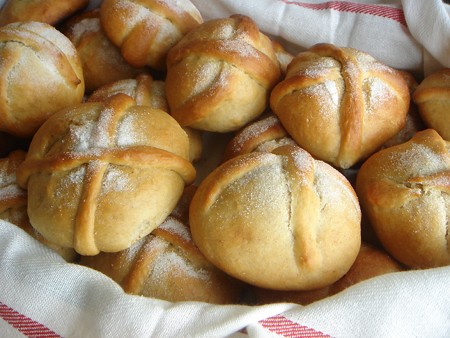
Pan de Muerto: Frida's Dead Bread and Blatant Bribery with Baked Goods
When in doubt, bake.
Actually when in doubt, cook, but for today we bake.
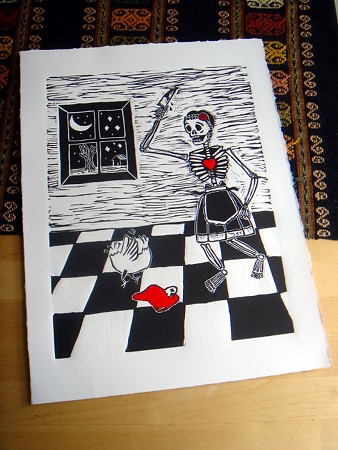
At the end of this semester one of my classes required a public presentation on a piece of art we created. I normally don't balk at speaking in public, but sharing anything creative I've made does tend to make me nervous. I was going to be showing a linoleum cut print I had been working on in my printmaking class, a piece that quite literally had my blood sweat and tears in it.
By some reports a bit gory, this piece to me is about the way I connect and express myself, through art and food, and also a bit about my family and a cultural heritage I claim more often than not through cooking (when you don't speak the language, food is universal). I have a fondness for my mother's stories and this reminds me of her telling me about my great-grandfather beheading chickens in their backyard.
Needing something to distract myself and hopefully distract and impress my audience if my art wasn't up to snuff, I decided a feat of baking was in order. It's a bit out of season, but Pan de Meurto, a traditional bread made for Day of the Dead, went perfectly with the theme of my art and I knew just the recipe. Guadalupe Rivera, Diego's daughter, put together a collection of Frida Kahlo's recipes. Being a great inspiration to me personally and artistically, I knew I had to use her recipe.
Now that it's done, I can't remember how the presentation went, or if the audience liked my piece, but I personally love seeing it everyday in its place honor in my kitchen, and I didn't have a single piece of bread left.
Frida's Pan de Muerte
Bread of the Dead
updated/expanded/adapted from Frida's fiestas: recipes and reminiscences of life with Frida Kahlo by Guadalupe Rivera and Marie-Pierre Colle
5 cups of flour, sifted
1 1/3 cups sugar, plus additional for dusting
2/3 cup plus 2 1/3 Tbs Butter
1 1/2 packages (3 tsp) yeast dissolved in 3 1/2 Tbs warm milk
6 large eggs (room temperature)
1 1/2 tsp ground cinnamon
1 1/2 tsp vanilla
1/3 cup milk
1) Melt butter and 1/3 cup milk on stove over medium low-heat. Allow to cool.
2) Mound the flour in the center of a large bowl and make a well. Add sugar, butter/milk mixture, yeast mixture, eggs, cinnamon, and vanilla to the well.
3) Gently work into a dough and knead until it pulls away from the side of the bowl. If it is too soft, add in more flour.
4) Shape into a ball, grease and flour lightly, and place in a greased bowl. Let stand in a warm place until doubled, about 2 1/2 hours. Cover with a towel and refrigerate overnight (at least 6-8 hours).
5) Divide the dough in half, divide each half into thirds, and each third into sixths. You should have 36 golf ball sized balls of dough. Take breaks while handling the dough and allow to rest in the fridge, it shouldn't get too warm.
6) Take one out of every 6 balls of dough (6 balls total) and reserve for decorations. For the remaining 30 balls, roll into a sphere and decorate with two small, thin, snakes of dough made to look like bones. Each of your balls of dough reserved for decoration should make 10 snakes and decorate 5 balls.
7) Place the decorated balls on a sheet of parchment, greased, on a baking sheet and let rise for a second time. Place in a warm location for about 1 1/2 hours or until the balls have doubled in bulk.
8) Sprinkle with sugar and bake in a preheated oven at 350 degrees. Each tray should take 12-15 minutes, but check as early as 10 minutes and leave in as long as 20 (checking often) in order to attain a golden color. Rotate as necessary in order to prevent over-baking. Ovens will vary. Bottoms should sound hollow when tapped.
Excellent when slightly warm and enjoyed with a cup of coffee, hot chocolate or tea.
Wednesday, May 26, 2010
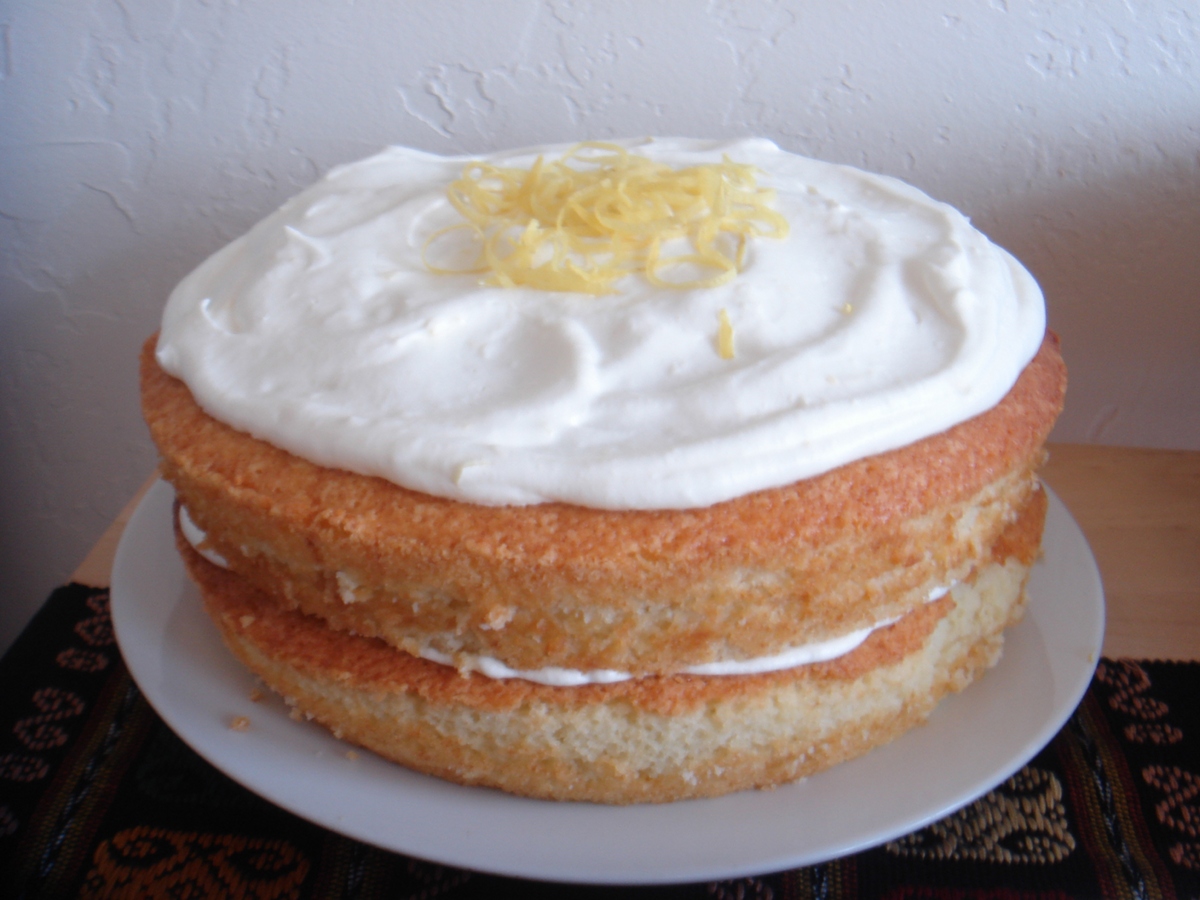
L-L-L-Luscious Lemon Cake
Today I bring you a very special guest post from the lovely Miss Susie-Q. Susie is quite the accomplished baker and was kind enough to make the PHENOMENAL cake we all enjoyed at my birthday party. I can't thank her enough still (for the cake and for helping wash the dishes after I sliced open my hand). Today is officially my last birthday related recipe so let's all sit back and enjoy a little cake.
If you ask me, cake is nature’s most perfect food. Okay, so maybe it leaves something to be desired from a nutritional standpoint, but whatever needs it fails to satisfy in the body, it more than makes up for with its ability to feed the soul. I do know people who dislike cake, but I am suspicious of them, in much the same way I would be suspicious of someone who doesn’t like birthdays or rainbows. Cake is celebration food. The point is not nutrition, but indulgence.
I have been baking for a long time. As a kid, my best friend would come over and we would pour over my mother’s cookbooks and after much deliberation and more than a little bickering, we would pick a recipe and spend the rest of the afternoon making it, then stuffing our faces. It should come as no surprise that I had a rather chubby adolescence. But as we entered different high schools, and drifted apart, I fell away from baking.
Then one foggy summer day, everything changed. I was working as a swim instructor. Berkeley doesn’t get real summers. It is typically terrible until about two in the afternoon, so I had essentially spent several hours trying to convince small children that they wanted to swim as they turned an increasingly unnerving shade of blue. And then there was cake. It was a coworker’s birthday, and they had picked up a sticky chocolate confection from a nearby bakery, and after the cold, uncomfortable and generally unpleasant morning, that cake was the best thing that could have possibly happened to me. I was hooked on cake. Every Thursday, for the next year, was Cake Day. I would come home on Wednesday evening to bake, and drag the cake around with me the following day, offering it to any and all takers until it was gone. There were chocolate cakes, pound cakes, a snickerdoodle cake, and as time went by, the recipes got more complex.
I’ve always felt that baking a cake is a great way to tell someone “hey, I like you.” So I was thrilled when Maya asked me to bake her a birthday cake. She had some very specific instructions: lemon cake, with lemon curd, and she didn’t like typical frostings, so it would have to be French meringue or whipped cream. I found a very highly rated lemon cake on epicurious.com, which was gluten-free (not necessary here). I found a recipe for whipped cream frosting, which needed to be stabilized. And I can’t eat eggs in any significant amount, so the lemon curd would be tricky. But all of those problems solved themselves. I made a substitution of both cake and regular unbleached flour for the rice flour and xanthan gum, figured out a good way to get the cream to keep its fluff, and Maya located a solid recipe for egg-free lemon curd, which I fixed up a smidge with some real butter for authenticity.
And so, after years of baking, and years of experimenting, I created my first original recipe. You won’t find it anywhere else, and it’s pretty amazing, if I do say so myself. Which I do.
I heartily concur.
Susie’s Lemon Cake
Cake:
1 cup canola oil
1 cup all purpose flour
1 1/2 cups cake flour
1/2 teaspoon salt
1 tablespoon baking powder
1 cup milk
1 teaspoon vanilla
1 tablespoon finely grated fresh lemon zest
2 cups granulated sugar
4 large eggs
Put oven rack in middle position and preheat oven to 350°F. Grease 9 inch round pans. Line bottom of each pan with a round of parchment or wax paper, then grease paper.
Whisk together flours, salt, and baking powder until combined well. Stir together milk, canola oil (1 cup), vanilla, and zest in another bowl.
Beat together sugar and eggs in a large bowl with an electric mixer at medium speed just until combined, about 1 minute. Reduce speed to low and add flour and milk mixtures alternately in batches, beginning and ending with flour mixture and mixing until just combined.
Divide batter evenly between cake pans, smoothing tops, and bake until a wooden pick or skewer inserted in center of each cake layer comes out clean, 30 to 35 minutes.
Cool cake layers in pans on racks 10 minutes. Run a thin knife around edge of 1 cake layer and remove from pan, placing on rack. Cool layers right side up. Repeat with second layer. Cool layers completely. Remove paper before frosting.
Lemon Curd:
1/4 cup cold water
1/2 cup sugar
3 Tbs Cornstarch
1/4 cup fresh lemon juice
2 tsp finely grated lemon zest
Pinch of salt
1-2 tbsp butter
In a saucepan, whisk together water, sugar, cornstarch, and salt until cornstarch is dissolved.
Bring mixture to a boil over medium-high heat, stirring constantly. When mixture thickens.
Reduce heat to low and cook for another minute, stirring constantly.
Pour mixture into a non-metallic bowl and add lemon juice and zest, mixing well. Add butter, mix.
Allow to cool and thicken at room temperature.
Can be refrigerated, covered, for several days. Before serving, beat thoroughly to a smooth, spreadable consistency.
Frosting:
1 tsp unflavored gelatin
4 tsp cold water
1 cup heavy whipping cream
1/4 cup confectioners' sugar
1/2 tsp lemon extract
zest of one lemon
Combine gelatin and cold water in small saucepan. Let stand until thick. Place over low heat, stirring constantly just until gelatin dissolves. Remove from heat and cool slightly. Whip cream, sugar, lemon extract and lemon zest until slightly thickened. While beating slowly, gradually add gelatin to whipped cream mixture. Whip at high speed until stiff.
Assembly
Cut cake layers in half, and spread lemon curd on bottom half, cut side up. Replace top half (cut side down).
Place one newly reassembled cake on cake plate, and spread generous amount (1 cup or so) of whipped cream frosting almost to edges.
Place second cake on top of the first, and mound remaining whipped cream on top.
Dig in.
Tuesday, May 11, 2010
Death by Caramel (and Chocolate)
I don't really like chocolate. How can you not like chocolate you may ask? Chocolate is nice, but most chocolate just bores me. When I do want chocolate though, I want it rich, dark, and bitter, like moist earth. You can describe my favorite coffee similarly. I usually prefer my chocolate in small, "just right" sized proportions and I prefer that it not stand alone. I love the bitterness to be offset by a bite of sweetness from a piece of fruit, or the toothsome meatiness of a bit of nut.
Of course there is another way to go.
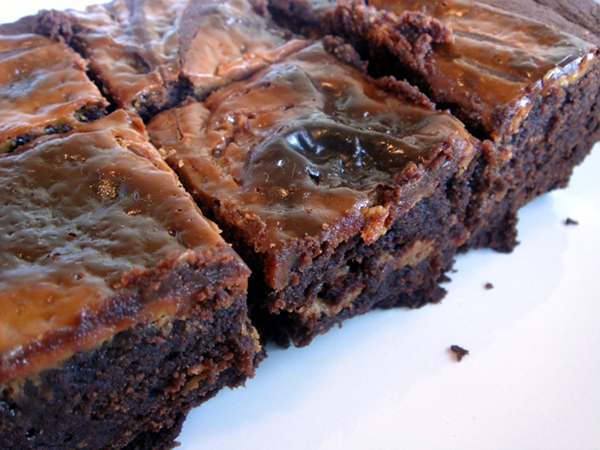
Caramel. Sweet, silky, luxurious caramel. Soft, chewy, buttery, caramelized caramel. Caramel and a hint of spice. Dulce de leche caramel. Pair it with dark 70% or higher chocolate, and you are headed towards a mighty fine dessert.
I recently had the opportunity to make a batch of brownies as a going away gift for a coworker friend of mine. I think the brownies I came out with may not have been what the rest of my coworkers expected, but I certainly enjoyed them and I think the departing friend did as well which is enough for me.

Actually, to be perfectly honest, I may have found myself trying not to lick a tin can, and instead hunting down every food item in the house that would taste good with the residual batter in the bowl or the residual caramel in the measuring cup, particularly the caramel, after making these brownies. They are THAT good.
I started with David Lebovitz' recipe for dulce de leche brownies. Then I adapted. Because its what I do. A touch of extra vanilla here, a sprinkle of ground canella (Mexican cinnamon) there, and replacing the regular chocolate with 50% extra-dark and 50% Mexican chocolate, the last of my stash from Oaxaca.
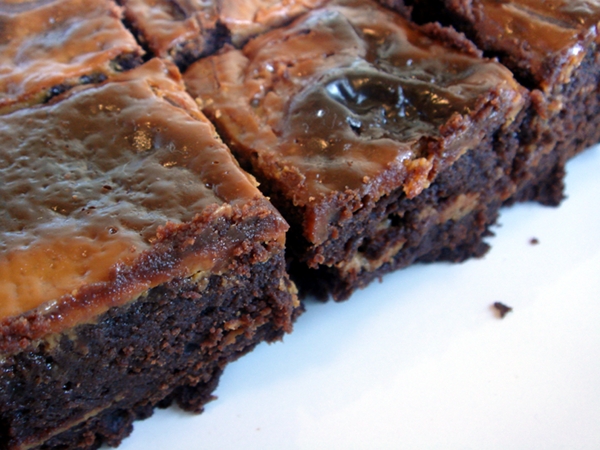
The next time you are in need of some serious chocolate, a dessert that doesn't soft shoe around, try these brownies. Cut them into small squares, and have just one (or two, or three - whatever is just right for you) with a cold glass of milk, a nice cup of coffee, or even a glass of red wine. If you're looking for death by chocolate, there are worse ways you could go.
Dulce de Leche Brownies
10.5 Tbs butter, plus extra to grease the pan
4 oz. dark chocolate
4 oz. Mexican chocolate
1/3 cup cocoa powder
4 eggs
1 1/3 cups sugar
1.5 tsp vanilla (I may have run out of vanilla and used half vanilla/half dark rum)
1.5 tsp cinnamon, preferably ground canela
1 1/3 cups flour
1/2 cup heavy cream
1 1/3 cups Dulce de Leche*
1) Line a 13x9in pan with a long sheet of aluminum foil that covers the bottom and reaches up the sides. If it doesn't reach all the way up and over the sides, use two overlapping sheets of foil. Grease the bottom and sides of the foil with some butter or non-stick spray.
2) Melt the butter in a medium saucepan. Add the chocolate pieces and stir constantly over very low heat until the chocolate is melted. Remove from heat and whisk in the cocoa powder until smooth.
3) Add in the eggs one at a time, then stir in the sugar, vanilla, cinnamon, and then the flour.
4) Spread half of the batter into the prepared pan. Drop one-third of the Dulce de Leche evenly over the brownie batter and drag a knife through to swirl it slightly. Spread the remaining brownie batter over, then drop spoonfuls of the remaining Dulce de Leche in dollops over the top of the brownie batter. Use a knife to swirl the Dulce de Leche slightly.
5) Bake in a 350 degree oven for 35 to 45 minutes. The brownies should feel just-slightly firm when done. Remove from the oven and cool completely.
According to David, these brownies become better the second day, and will keep well for up to 3 days.
*To make your own dulce de leche at home, take one 14oz can of sweetened condensed milk, remove the label, and cut two holes in the top with a can opener. Place in a medium sauce pan and fill saucepan with water one inch from the rim of the can. Simmer over medium-low heat for 2-4 hours depending on how thick you want your caramel (I used about 2.5 hours for the caramel in these brownies), refilling water as necessary. One 14oz can makes just enough caramel for the brownies.
Wednesday, March 24, 2010
A Post that IS About Pie
As of Saturday, Spring has sprung. It seems like the start of the season has geared me up for some serious baking. Winter was all about braises, chiles, and soup, but so far Spring is all about butter and flour.

It started innocently enough with pie for a friend's birthday. I'll call this the mystery caramel apple pie, mostly because I never actually had any and therefore it is a mystery to me as to how this pie turned out. I decided to fill that sweet void by baking some cookies, then a few microwave cupcakes, a pie for pi-day, and suddenly last weekend I was on my third pie (and third pound of butter) this month.
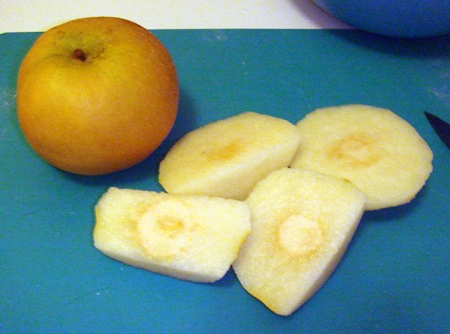
This latest pie actually brings us right back to where we started, a birthday pie! This pie was not a mystery caramel apple pie, but it was a blackberry Asian pear surprise pie. This pie was a surprise in that it was a surprise as to whether it would actually taste good. Prior to making this pie, I had actually never eaten an Asian pear.
It started as a Strawberry Rhubarb pie, with an olive oil crust and an oat crumble to make it more "healthy." Unfortunately I could find nary a stalk of rhubarb, and when I went to the store the were sold out of strawberries (seriously, who sells out of strawberries?!). So I grabbed what was on sale/in-season which happened to be Asian pears and blackberries. If the 14 diners who inhaled it on Saturday night are any indication, I think it it worked out.
Blackberry Asian Pear (Surprise) Pie
Crust
1 cup AP Flour
1 cup Whole Wheat Flour
1/4 tsp salt
2 tsp sugar
1/4 cup Olive Oil
1/2 cup COLD water
Filling
2 Asian Pears, Aprox 3 cups of fruit, 1/2 inch dice
12 oz of Blackberries
1/4 tsp ginger powder
2 tbs sugar
zest of one tangerine
juice of 1/2 lemon
4 heaping tbs of flour
Crumble Topping
1/4 cup flour
3/4 cup rolled oats
1/4 cup brown sugar
1/4 cup sugar
6 tbs butter
Prepare the Crust
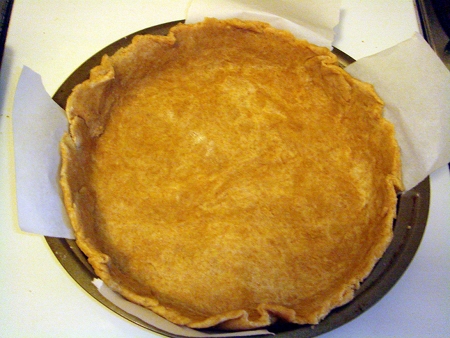
1) Prepare a 9" pie pan by lightly greasing it with olive oil. Or if you are me and are missing your pie pan, line a 9" cake pan with parchment and hope for the best.
2) Combine the flours, salt, and sugar in a medium sized mixing bowl.
3) Add the oil and mix it in with a fork.
4) Add the water, mix with the fork until it is absorbed, then knead lightly (I do this with just one hand, in the bowl) until the dough comes together into a ball.
5) Turn the dough out on a lightly floured work surface. Sprinkle a little flour on the ball of dough and on the rolling pin, and roll the dough out into a circle large enough to fit your tart pan. Turn the dough by 45 degrees (8 turns to a circle) every time you roll the pin forward and back, adding a little more flour underneath and on the dough if it seems on the verge of becoming sticky. Be quick and sure of yourself, try not to overwork the dough.
6) Transfer the dough carefully into the prepared pan and line it neatly. Trim the excess dough (delicious baked with a little cinnamon and sugar), and place the pan in the fridge for 30 minutes to rest.
While the crust is resting...
Prepare the filling
7) Place all of the ingredients except the flour in a large bowl. Carefully mix the ingredients mix ingredients together with a folding motion and either a large spoon or spatula. Mix just enough to distribute the spices and citrus.
8) Sprinkle the flour over the mixed fruit and mix gently to combine. Try to keep the blackberries whole.
and...
Prepare the Topping
9) Use a fork to combine the crumble ingredients, if you are having difficulty incorporating the butter, melt until softened but not liquefied (aprox 15-30 seconds)
then...
Put it All Together
10) Blind bake the crust - take the crust out of the fridge, prick it repeatedly with a fork, and bake at 400 degrees for 7-10 minutes. Just to dry the surface to the touch.
11) Gently fill the crust with the pie filling, and evenly top with crumble topping.
12) Bake at 400 degrees for an additional 15-18 minutes (until lightly golden brown), then lower the temp to 350 and bake until the crust is cooked and the topping is a deep golden brown, about 15 minutes depending on the oven and how long you cooked prior to the final bake.
Sunday, March 7, 2010
Bread.
Fresh. Baked. Bread.
Smell it. Taste it. Say it with me now...
Fresh Baked Bread.
Its like a little prayer. Well, it is for anyone who isn't avoiding carbs anyways.
I don't know what too me so long. This recipe has been floating around the internet for almost FOUR years. Where was I? Drooling over the thought, and lamenting my lack of appropriate cookware.

No knead bread was introduced to the the world by Jim Lahey of the Sullivan Street Bakery via Mark Bittman of the New York Times, though its based off of recipes that have been around for ages. Its got 4 ingredients, 5 if you are me and you like to mess with things, and is so easy a 4 year old can do it.
There were two problems with this recipe that do put it out of the reach of some (including me for so long). One, this recipe takes time. By trading out the physical effort, one must put in almost a whole day of waiting. So hard!
Secondly, one needs a large pot that can be put in a very, VERY, hot oven. My new baby came in handy in this capacity, but, as this is a fairly recent acquisition, I was ill-equipped before now.
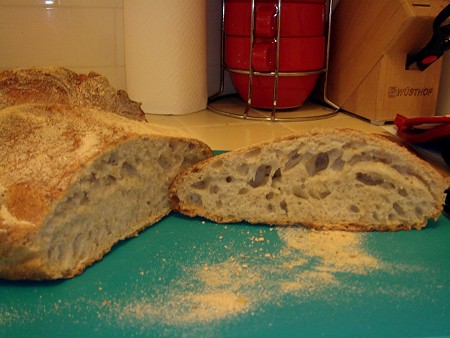
If you have the hardware, and you have the patience, please make this bread. Its so good. Fresh baked bread is pretty much always good, but THIS bread is really good. It's chewy, full of big holes for filling with butter, and has a crispy crunchy golden crust. Do it. Do it now. What are you waiting for?
No Knead Bread
Adapted from Jim Lahey, Sullivan Street Bakery
(I made mine with a bit of whole wheat flour from my farm, but if you don't have any or don't want to use any, just use all all-purpose flour)
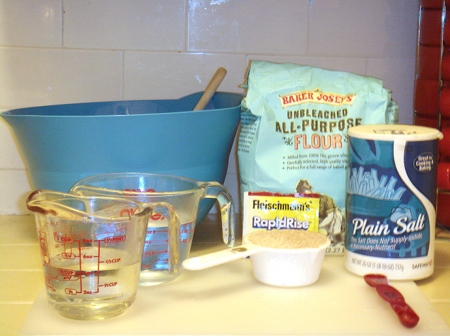
2 1/2 cups All Purpose Flour
1/2 cup Whole Wheat Flour
1/4 tsp instant yeast (like Fleischmann's RapidRise)
3/4 tsp kosher salt (or 1 tsp table salt)
1 1/2 cups warm water
Special Equipment: a large (6-8 quart) heavy pot with a well-fitted lid.
1) Mix all of the dry ingredients in a large mixing bowl.
2) Slowly pour in the warm water.
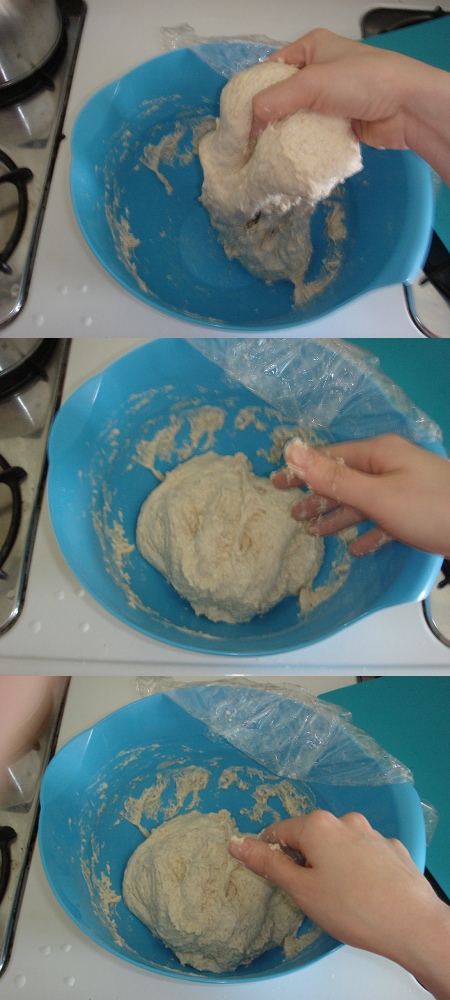
3) Stir into a gooey, sticky mess of dough, cover, set aside. It will look wet. It's supposed to.
4) Ignore the dough for 8-10 hours.
5) Uncover, and with wet hands, lift the dough out of the bowl and fold over on itself several times. Just flop it around, this is not kneading, this is just poking it. This helps, I promise. This will help get more of those delightful big bubbles.
6) Put the dough back in the bowl, cover, ignore for another 8-10 hours.
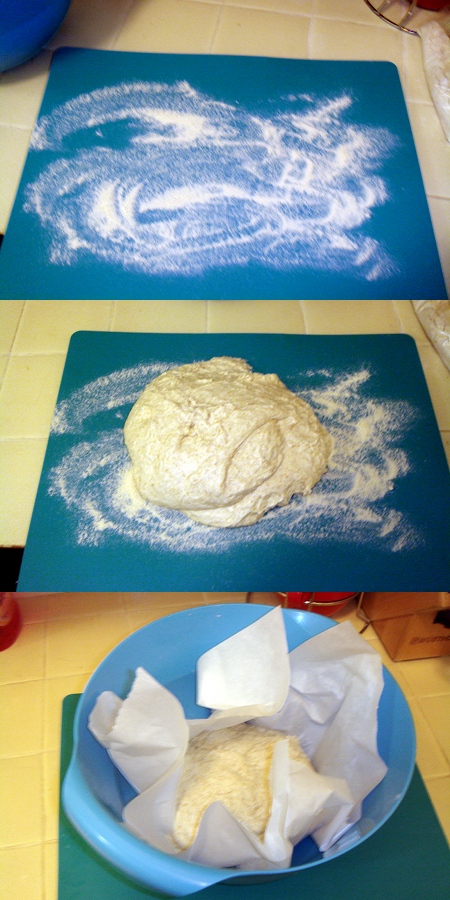
7) Sprinkle some cornmeal or flour on a board, and with wet hands, lift the dough out of your bowl and drop on the board.
8) Fold it over and flop it on itself a couple more times and shape as best you can into a ball-like shape.
9) Place the ball of dough onto a floured towel (NOT terry cloth) or piece of parchment paper. Place back in the bowl and let it rise another 1-2 hours.
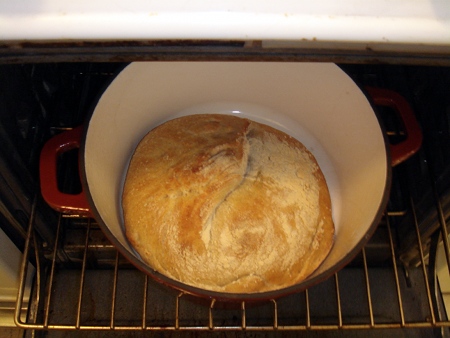
10) 30 minutes before the dough is finished with its final rise, place the pot in the oven and preheat to 450 degrees.
11) When your dough has finished its final rise (it should be about double the size), quickly open the oven, lift off the lid of the pot, drop your dough in the pot, bake for 30 minutes.
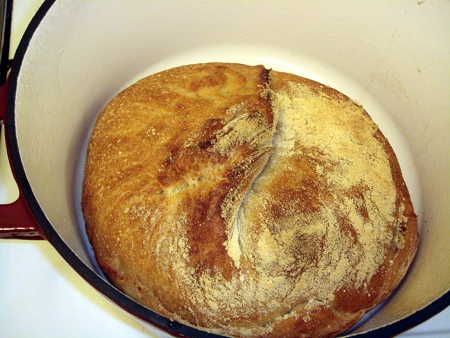
12) Remove the lid of the pot and bake an additional 15-30 minutes. The bread should look brown, shiny, and thump when you tap it.
Let cool, slather with butter, enjoy!
Thursday, February 25, 2010
Baking Cookies with John Mayer
Chocolate and spice. To me, they go hand in hand. In fact, I prefer my chocolate to have an edge. No milk bars for me, bring on the 70% dark with cocoa nibs and chile pepper. I have been thinking about making some spiced chocolate icebox cookies for a week, but I needed to 1) find a good starting recipe and 2) make it happen.
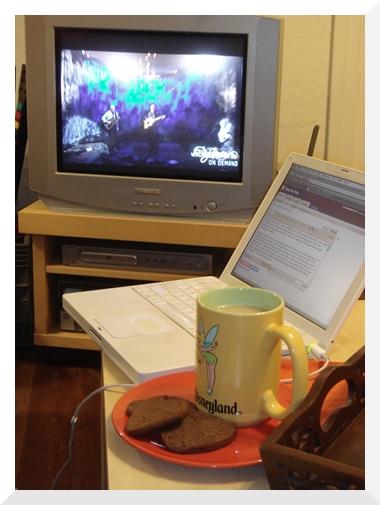
Tonight, I finally baked some up with my new friend John Mayer. You see, he and I have developed a very close relationship over the last few days, and, what with his On Demand VH1 specials expiring at midnight and my access to his Storytellers episode coming to a close, I felt I should celebrate our time together.
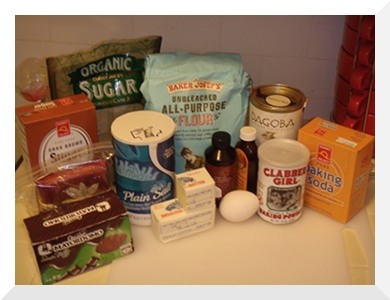
So while Mr. Mayer sang the best of his back catalog and played some bitchin' guitar, I got out the butter, flour and sugar, and mixed up some lovin' from the oven. I started with this recipe for plain chocolate icebox cookies and then spiced it up a little. You know when I said I don't mess with recipes for baked goods? Yeah, I lied. It started with a little cinnamon and a little Mexican chocolate, but then I didn't have enough cocoa so I had to improvise a little. It kind blew up from there.
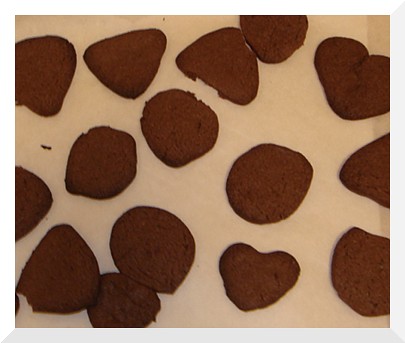
I didn't take these cookies quite as far into spicy as I had originally intended, but they do have a nice warmth. I think in this case there is something to be said for subtlety. Even though they aren't exactly what I had in mind when I started out, they're still pretty darn good dunked into tea. I've posted the final recipe as I made it below, but if I did it again I would up the spice factor (1/2 or 3/4 tsp cinnamon maybe, a full 1/4 tsp black pepper? I will have to play with this), use all cocoa, leave in the extra 2 Tbsp of sugar, and not bake them quite as long (take out at 8-9 min?).
*Soundtrack optional, but something tells me the man appreciates quality baked goods.
Spiced Chocolate Icebox Cookies
1 2/3 cups all-purpose flour
1/2 cup unsweetened cocoa (I ran out and used 1/4 cup cocoa and 1/4 cup hot chocolate mix)
1 tsp baking powder
1/2 tsp baking soda
1/4 tsp salt (table salt)
1/4 tsp Mexican Cinnamon, ground (canela)
1/8 tsp black pepper, ground
3/4 cup butter, unsalted and softened (3/4 cup = 1.5 sticks)
1/2 cup packed dark brown sugar (original recipe calls for light, I was out)
1/2 cup minus 2 Tbs sugar (I removed 2 Tbs to compensate for the sugar in the drink mix, if using all cocoa leave in)
2 squares (2 oz) - ish chocolate, melted and cooled (I used 2 squares Mexican Chocolate plus 1/2 square Belgian Dark to smooth it out)
1 tsp vanilla
1/8 tsp almond extract
1 large egg
Mix Dry Ingredients
1) In a medium-large sized bowl, thoroughly mix together flour, cocoa (or cocoa/hot chocolate mix), baking powder, baking soda, salt, cinnamon, and pepper with a whisk or a fork.
Mix Wet Ingredients
2) In a second, larger, bowl, beat butter, brown sugar, and granulated sugar with a mixer on medium until light and fluffy (if you don't have a mixer this will still work, just use a whisk and some arm strength). Beat in chocolate, vanilla, and almond extract until well combined. Beat in egg.
Mix Wet and Dry Ingredients
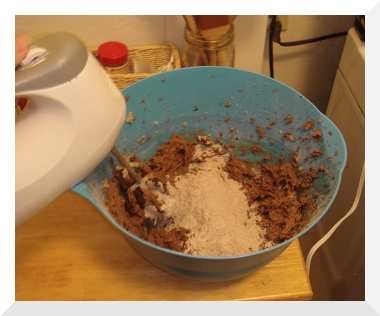
3) Reduce speed to low and beat in flour mixture in three batches. Combine well after each addition.
4) Divide dough in half, roll into 12" logs, and wrap in parchment paper. Refrigerate at least 2 hours, or overnight. You can also wrap parchment covered log in plastic wrap and freeze.
Bake
5) Preheat oven to 350 degrees F. Remove one log of dough from the fridge (leave second log in the fridge to remain firm or keep for later use) and cut into 1/4 inch slices. Place slices on two parchment lined cookie sheets one inch apart.
6) Bake 10-11 minutes, switching the sheets between racks halfway through baking. Cool on cookie sheets for 1 minute, transfer to wire cooling racks (or a plate) to cool completely. Repeat for remaining dough.

